Ergosoft – HP Latex 700W / 800W – White / Double Sided Printing
The goal of this document is to describe the Ergosoft workflows for white printing on the HP Latex 700W and 800W.
Spot Mode
This User Guide explains the preparation of job printing an image, which contains a spot white separation.
Image Requirements
The artwork must have object(s) with a Spot Color swatch assignment. Name this Spot Color swatch *White*.
RIP Preparation
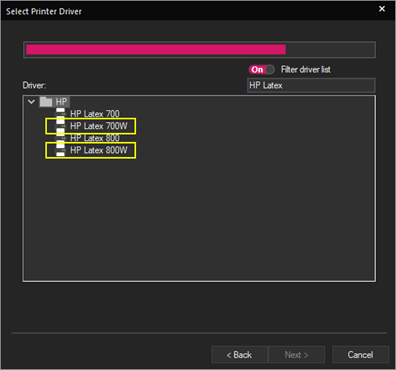
Add a Print Environment based on HP Latex 700W or HP Latex 800W
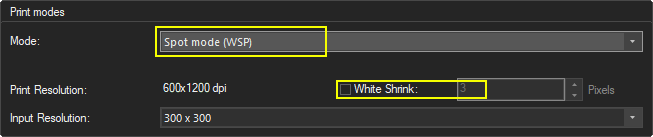
Configure Print Environment and select WSP print mode and if required, activate white layer choke.
Define automatic Spot Color White mapping and preview display color.
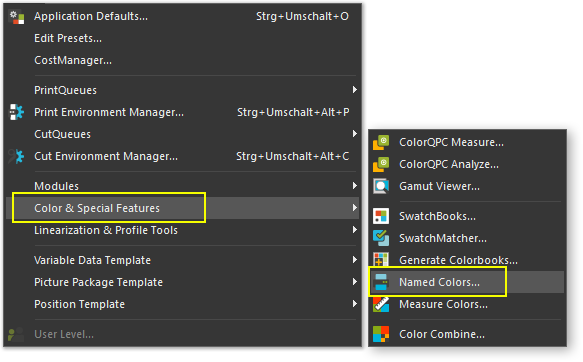
Go to Tools > Color & Special Features > Named Colors…
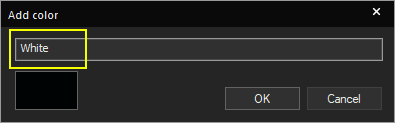
Add new color use Color Picker.
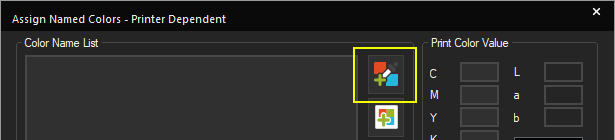
Choose Preview Color
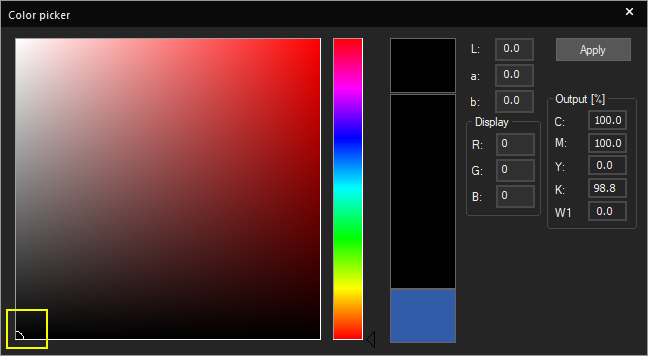
Name color *White*.
Define Print Color Value (C=0; M=0; Y=0; K=0; W1=100).
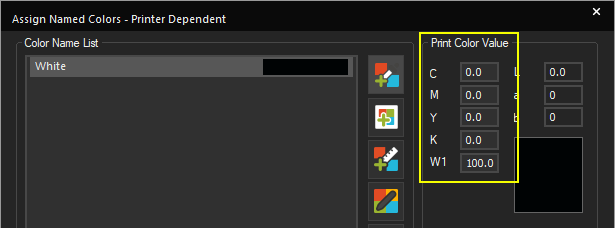
Click OK.
Result: Any object in an artwork having the Spot Color named *White* assigned as fill color will automatically be mapped to the white printer channel.
The preview color shown in the JobComposer and on the printer front panel preview will be displayed as black. This serves the purpose to improve the areas identification where white will be printed (example see Job Preparation).
Spot Job Preparation
Create a new Job while having the prepared 700W/800W Print Environment activated.

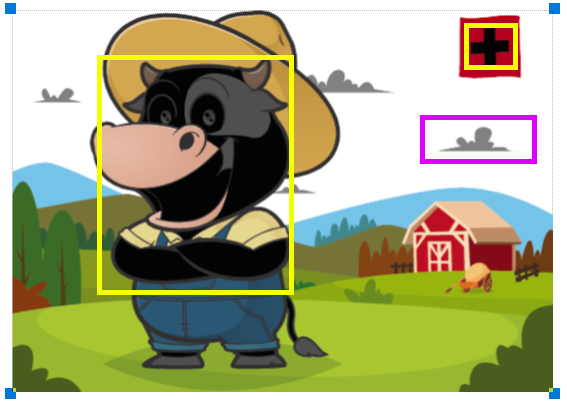
Import image(s) containing spot color White object.
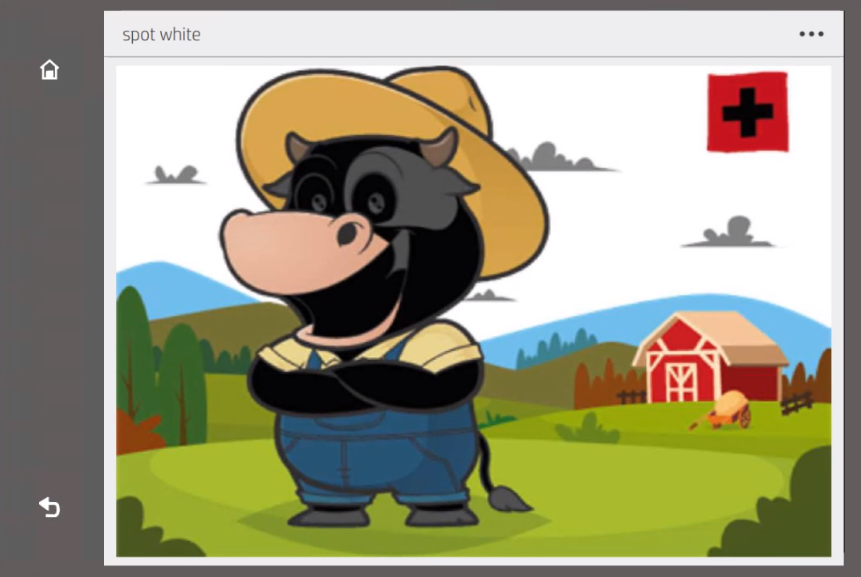
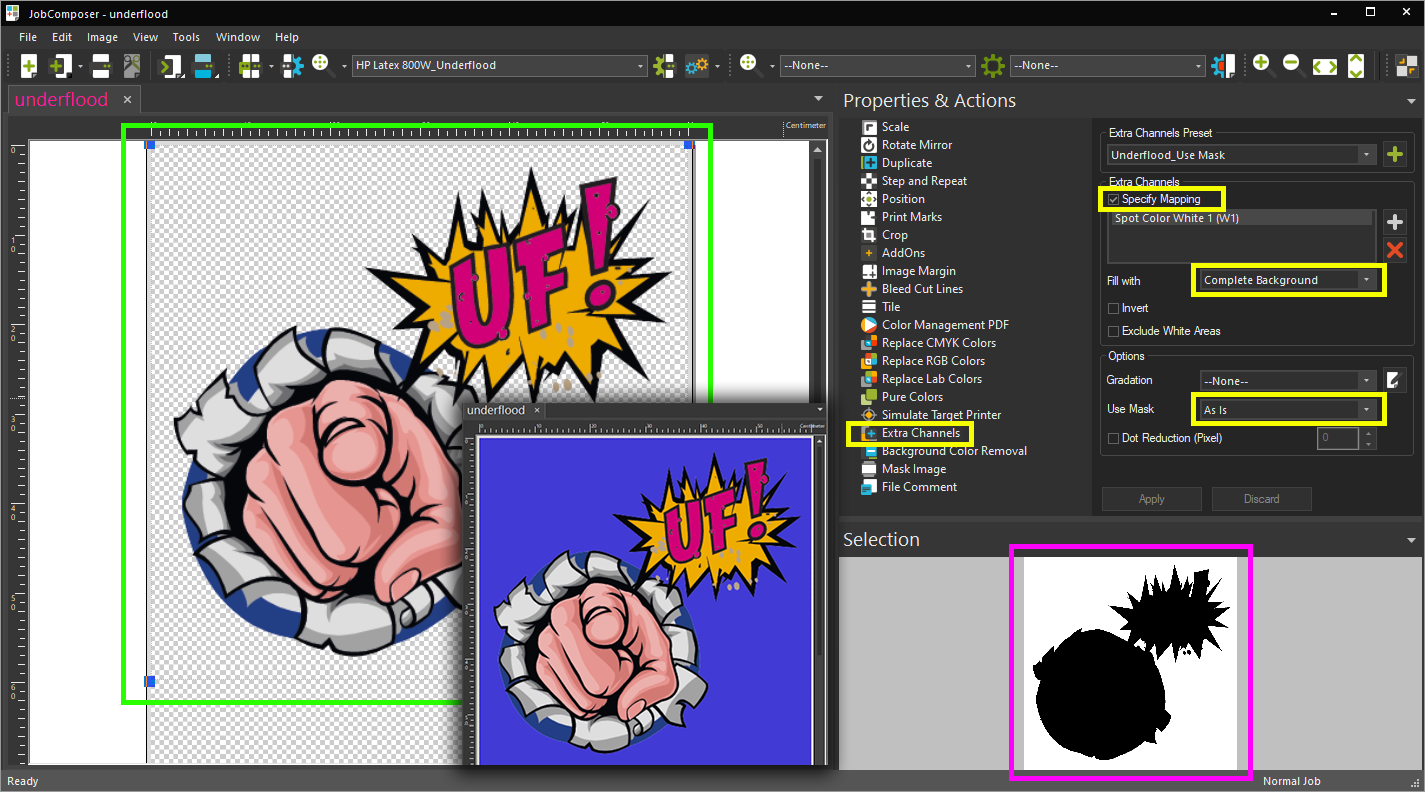
All objects containing spot color White will automatically be replaced to print value white. The preview of these objects will be displayed as black (Marked yellow on the right), respectively as grey (Marked Magenta on the right) if opacity is not set to a 100% in the artwork.
Previews in the JobComposer will look as shown on the right.
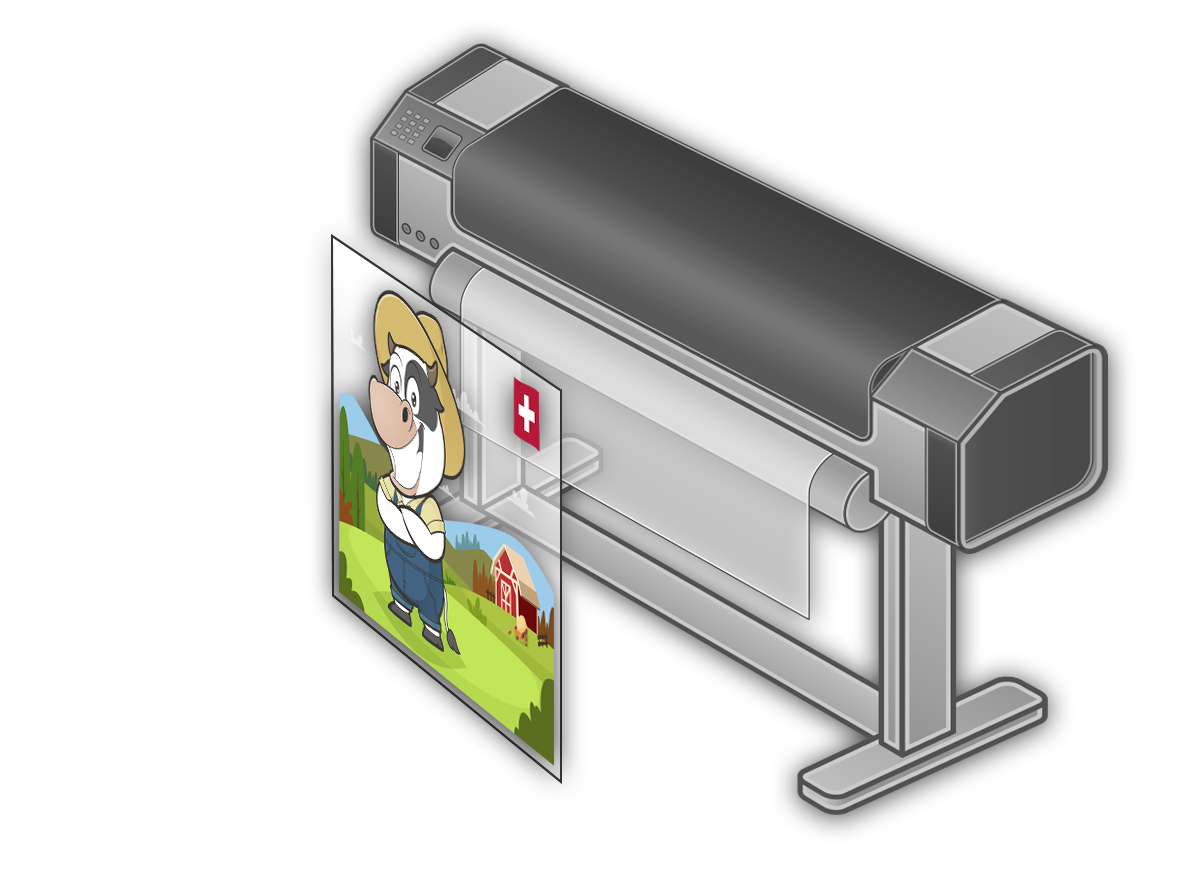
Print Job
The sample Job above is going to print the color & white image components as one layer. The example use case illustrates a clear substrate.
Spot Mode Jobs on the Front Panel
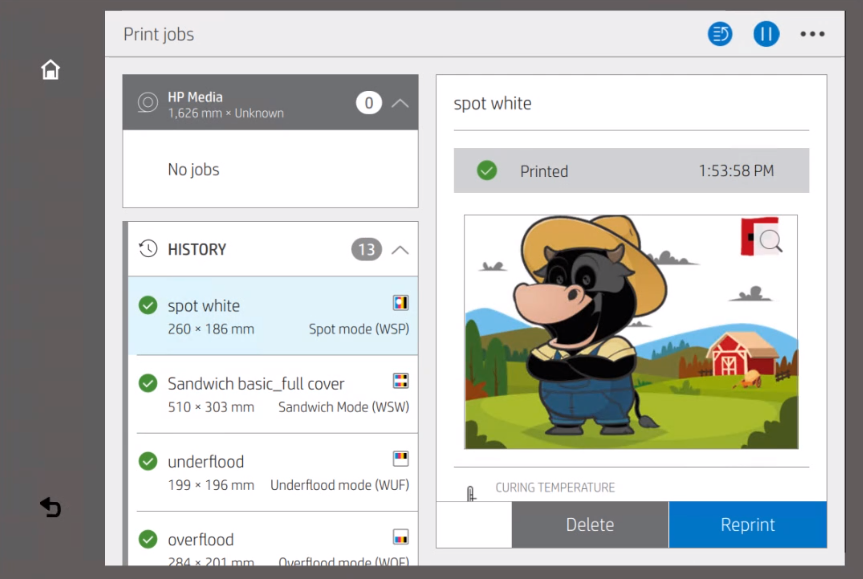
Spot White mode jobs (WSP) show the white area printing as e.g., black and color composition within one preview on the printer’s front panel.
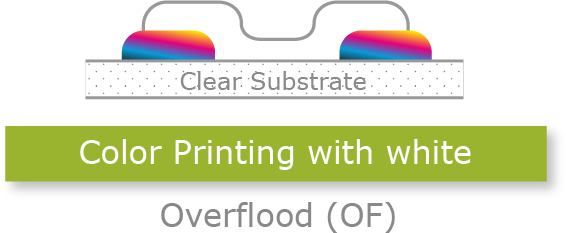
Overflood (OF)
This User Guide explains the preparation of job for which the viewer side is reversed through a clear substrate.
RIP Preparation
Add a Print Environment based on HP Latex 700W or HP Latex 800W
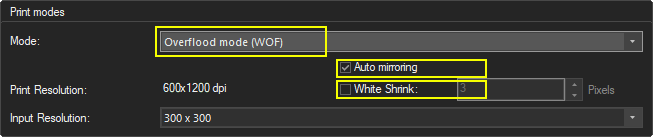
Configure Print Environment and select White Overflood (OF) print mode.
- If required, activate white layer choke.
- If required, select mirror (applies for Bottom and White Layer)
Overflood (OF) Job Preparation
Create a new Job while having the prepared 700W/800W Print Environment activated.
Import image(s).
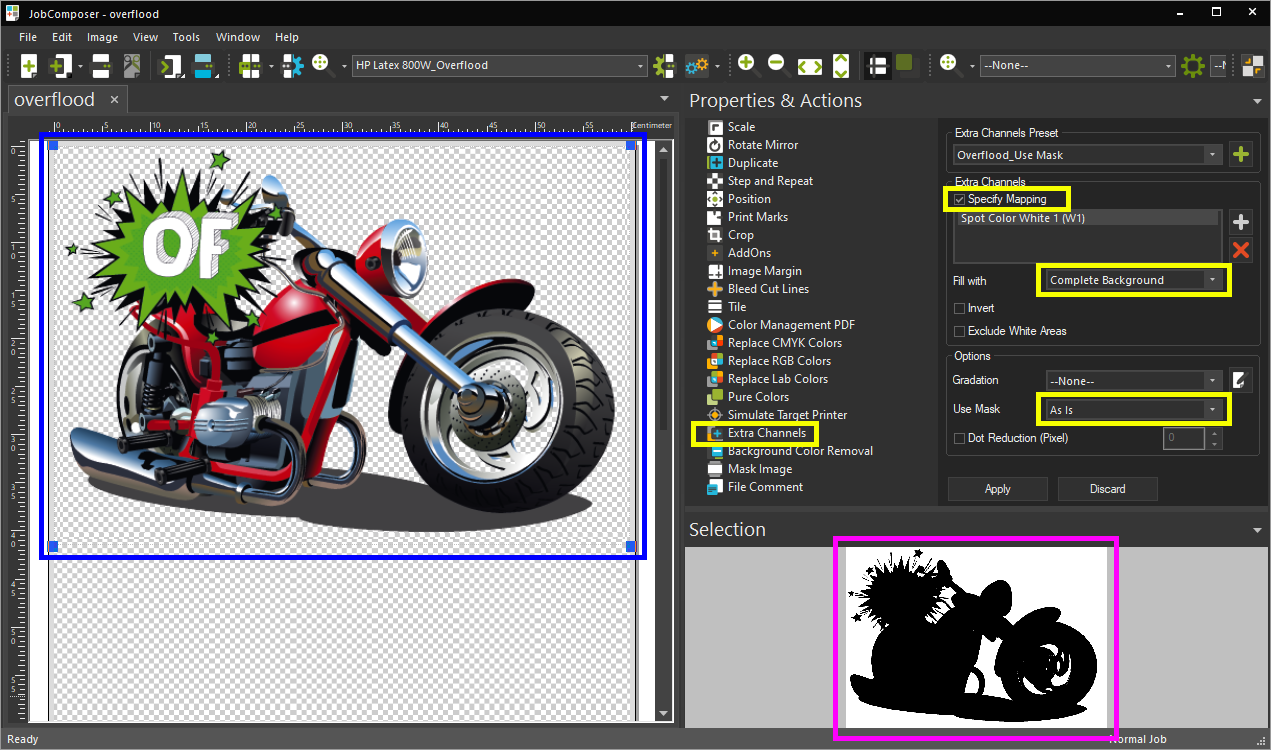
Generate overflood white layer with Extra Channels.
- Select image(s).
- Go to Image Properties > Extra Channels.
- Activate & Specify Mapping.
- Use mode: Complete Background.
- If required, use mask.
- Click apply.
- Recommendation: Save these settings as preset.
Print Job / Send Job to Printer with the number of copies desired.
The sample Job above is going to print the color layer first and the white layer second on top. The example use case illustrates a clear substrate.

Print Front Panel – Previews
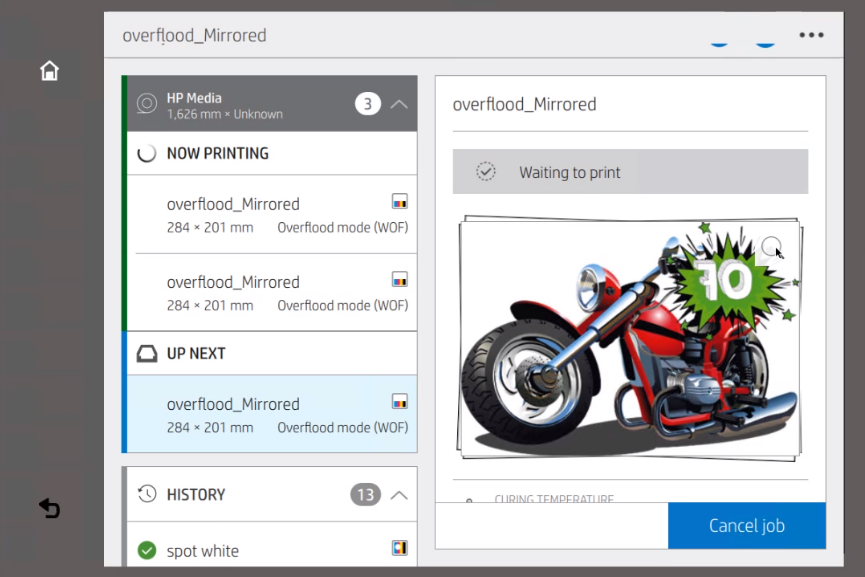
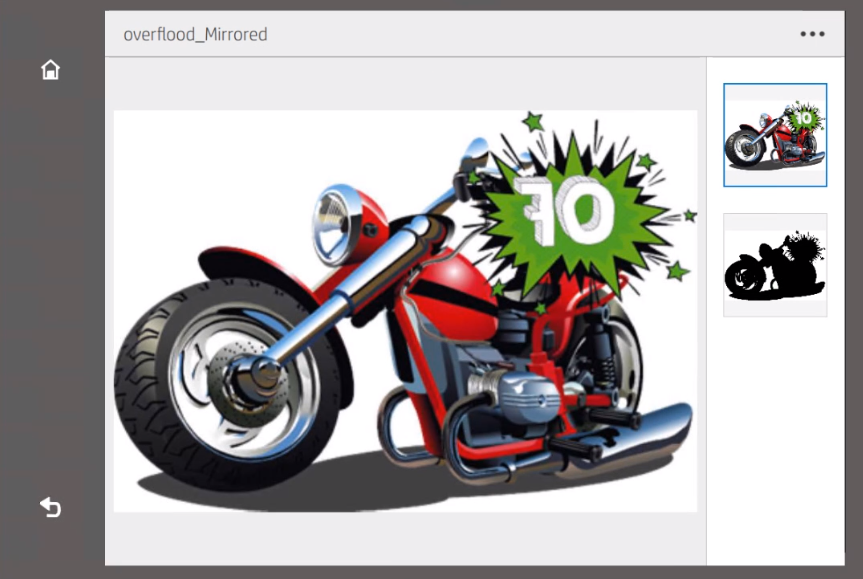
Within the printer’s front end, Overflood (OF) jobs show the preview of the color layer (Bottom Layer) in the job history (1). The thumbnails (2/3) under the job details reflect the print sequence of the layers.
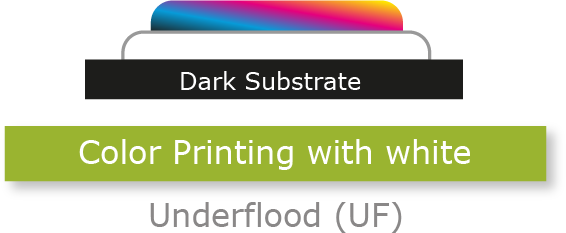
Underflood (UF)
This User Guide explains the preparation of job, printed on colored substrate and for which the viewer side is regular.
RIP Preparation
Add a Print Environment based on HP Latex 700W or HP Latex 800W
Configure Print Environment and select White Underflood (UF) print mode.
If required, activate white layer choke.

Underflood (OF) Job Preparation
Create a new Job while having the prepared 700W/800W Print Environment activated.
Import image(s).
Generate underflood white layer with Extra Channels.
- Select all image(s).
- Go to Image Properties > Extra Channels.
- Activate & Specify Mapping.
- Use mode: Complete Background.
- If required, use mask.
- Click apply.
- Recommendation: Save these settings as preset.
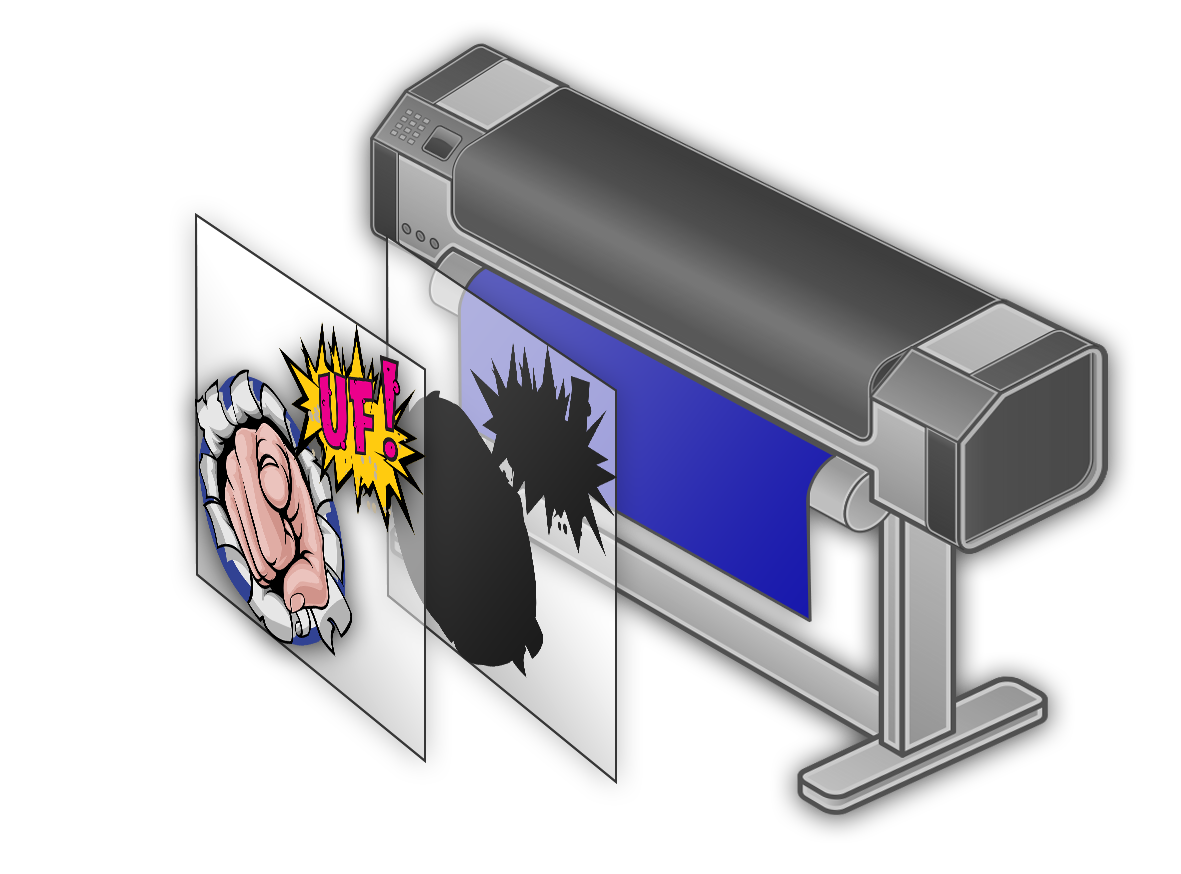
Print Job / Send Job to Printer with the number of copies desired.
The sample Job above is going to print the white layer first and the color layer second on top. The example use case illustrates a blue substrate.
Print Front Panel – Previews
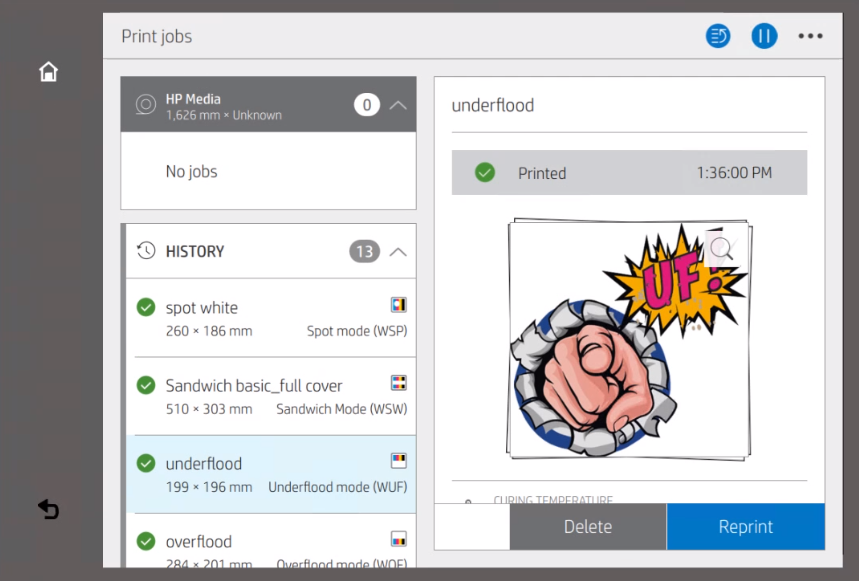
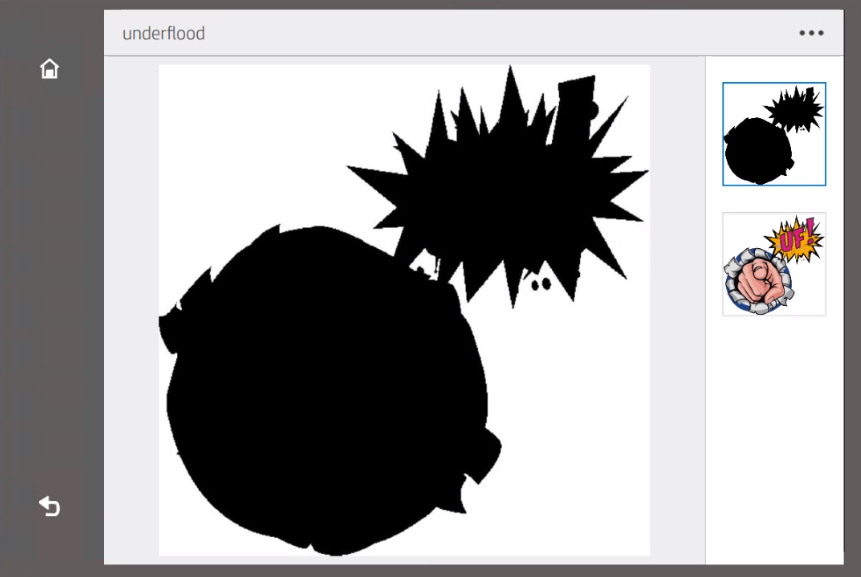
Within the printer’s front end, Underflood (UF) jobs show the preview of the color layer (Top Layer) in the job history (1). The thumbnails (2/3) under the job details reflect the print sequence of the layers.
Sandwich Modes
This User Guide explains the preparation of a Sandwich Ergosoft Job printing a color Top, white and Bottom layer, either using the same images or different ones.
RIP Preparation – Different images for Top & Bottom Layer
The example is using two images only to keep it simple. It is possible to create complete Top Layer & Bottom Layer image compositions using several images.
Add a Print Environment based on HP Latex 700W or HP Latex 800W
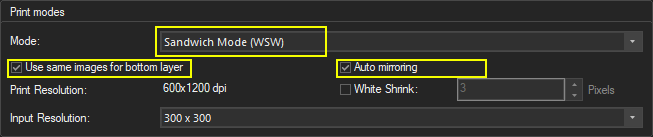
Configure Print Environment and select WSW print mode.
- If required, activate white layer choke.
- If wanted, allow white layer generation based on bottom layer.
Default: White is generated from Top Layer.
Sandwich Job Preparation – Different images for Top & Bottom Layer
Create a new Job while having a 700W/800W Sandwich Print Environment activated.
Recommended: Use Image Preset to ..
.. deactivate Print Marks when images are being imported.
.. adding auto-scaling to same size if original images for Top and Bottom Layer are of different sizes.
Mandatory: Do not use asymmetric Job margins

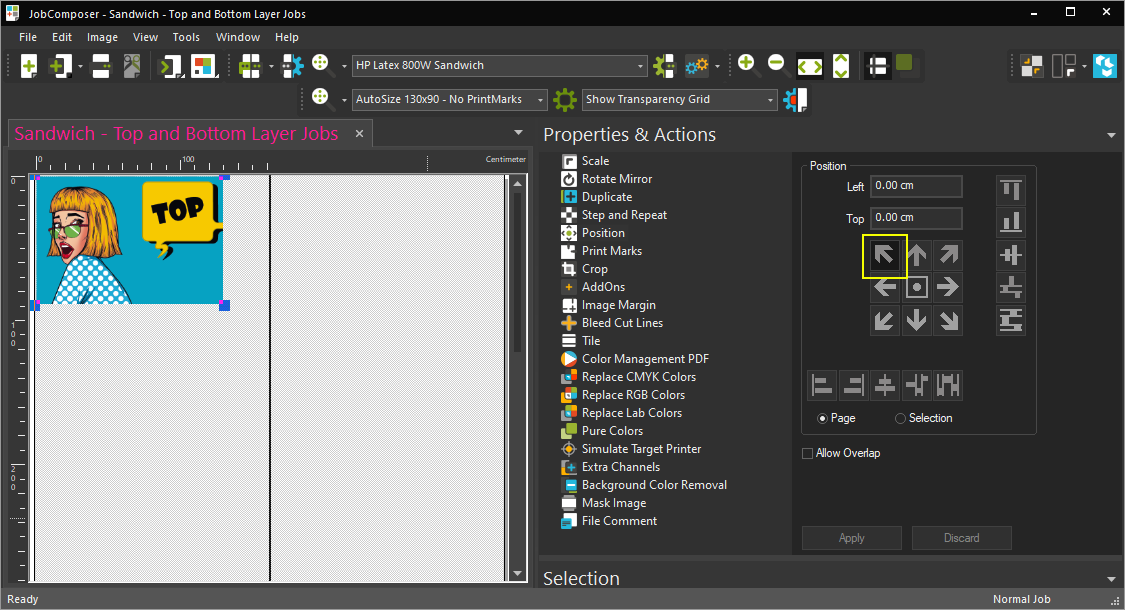
Import the Top Layer image to Sandwich Job.
Align first image top left.
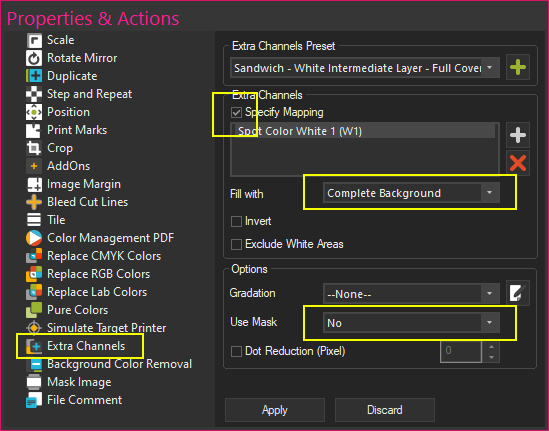
Generate intermediate white layer with Extra Channels.
- Select Top Layer image.
- Go to Image Properties > Extra Channels.
- Activate & Specify Mapping.
- Use mode: Complete Background.
- Use no mask.
- Click apply.
- Recommendation: Save these settings as preset.
Import the Top Layer image to Sandwich Job.
Align first image top left.
Print Job / Send Job to Printer with the number of copies desired.
Note: No further actions are required in the PrintQueue. Such an advanced Sandwich Print Job is going to show up in the Queue as any other Job.
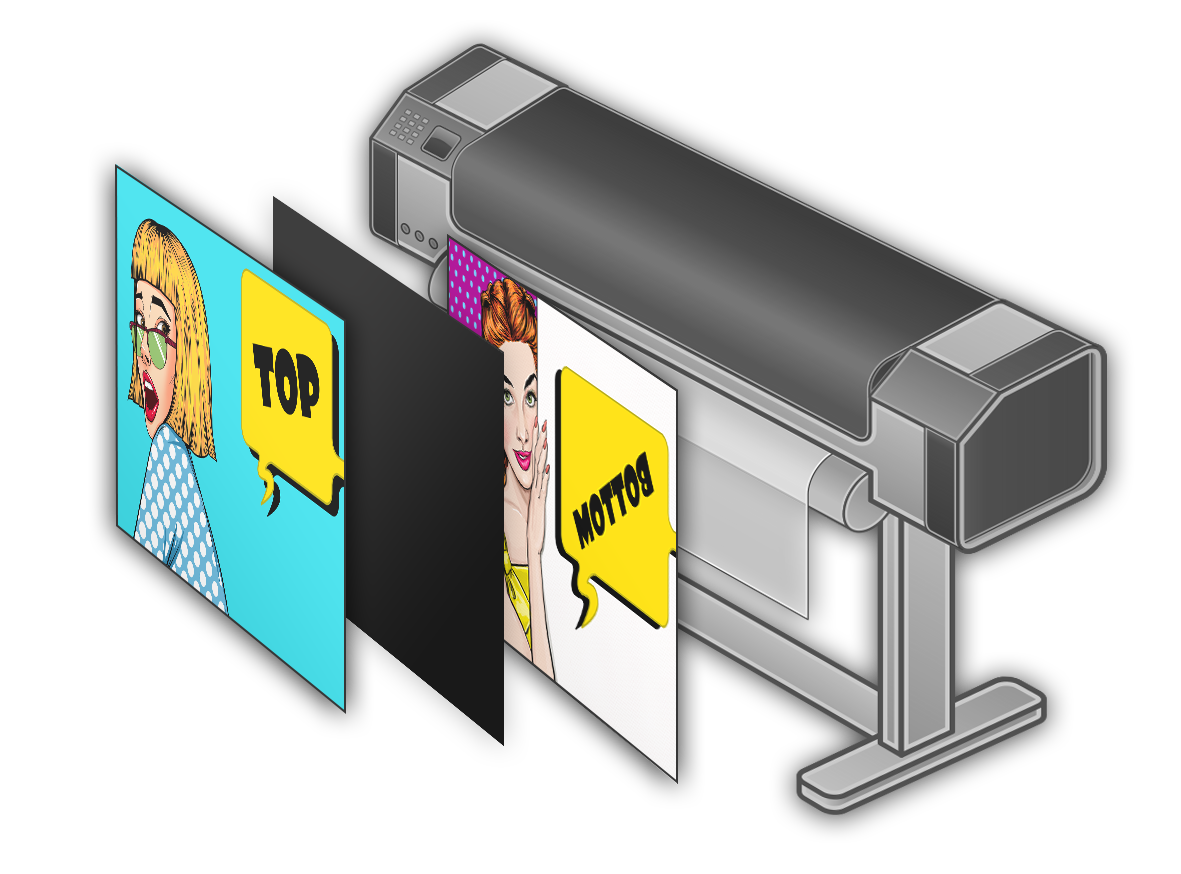
The layers of the sample Job above are going to be printed as seen on the right.
Print Front Panel – Previews
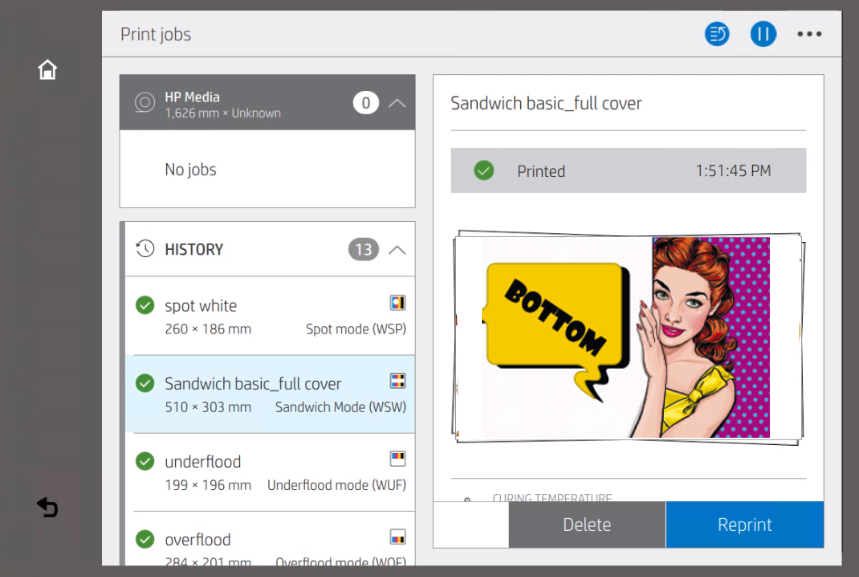
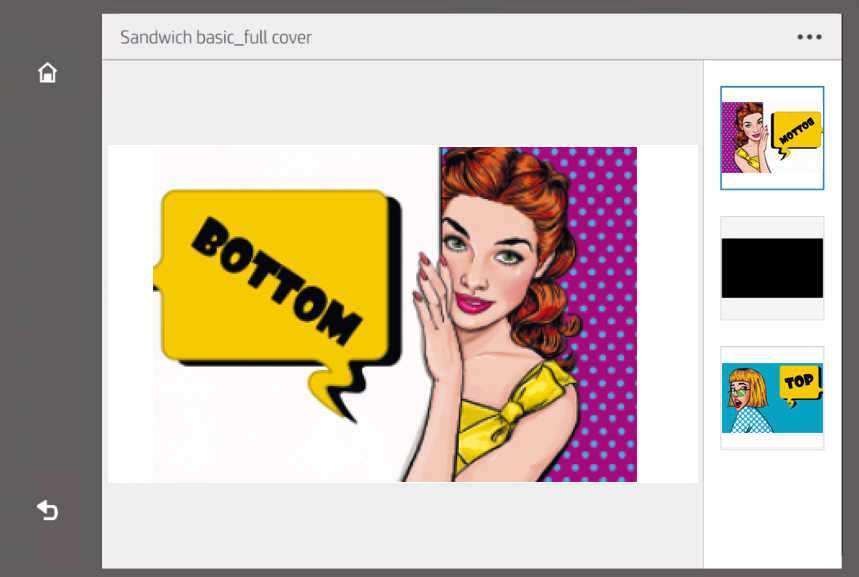
Within the printer’s front end, Sandwich (WSW) jobs show the preview of the color layer (Bottom Layer) in the job history (1). The thumbnails (2/3/4) under the job details reflect the print sequence of the layers.
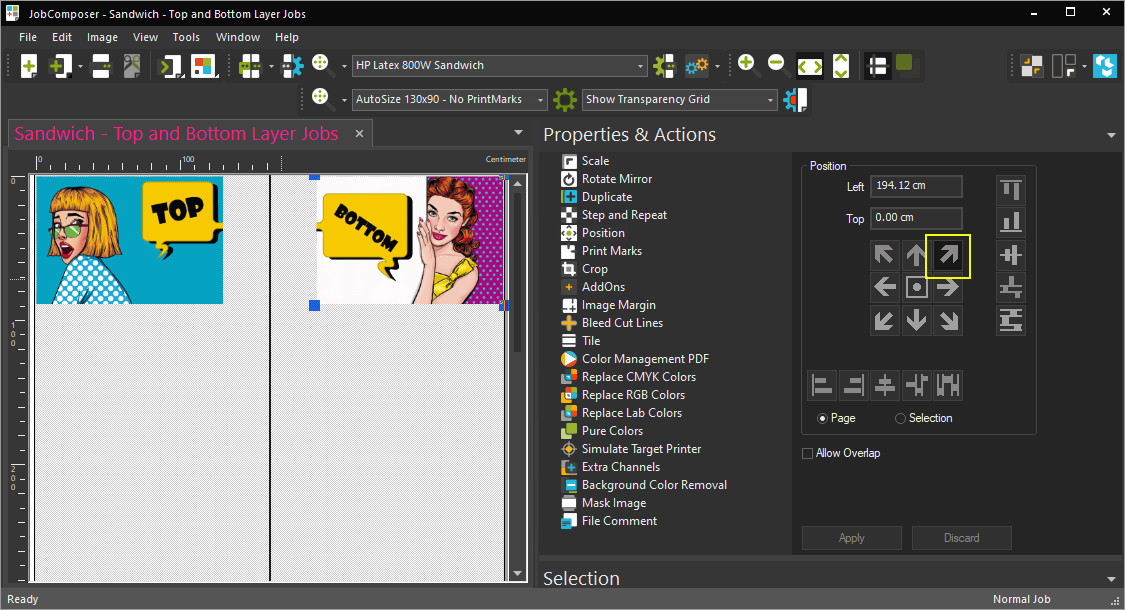
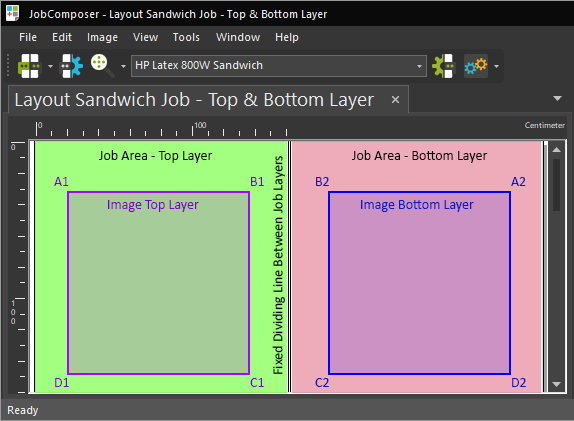
Sandwich Job Layout
As soon a HP Latex 700W/800W Print Environment is selected, which uses the Sandwich mode (WSW) and “Use same images for bottom layer” is not checked, the Job layout changes to this type of double-sided Job automatically.
RIP Preparation - Same images for Top & Bottom Layer
In case the same images must be printed on the Top & Bottom Layer, the following driver option allows to generate the Bottom Layer (optionally mirrored) automatically.
Add a Print Environment based on HP Latex 700W or HP Latex 800W
Feature Scope of Ergosoft Sandwich Modes
The Ergosoft Sandwich modes support:
- Different or same images for Top and Bottom Layer Job.
- Multiple images per layer Job.
- WYSIWYG split Job layout pane (Top and Bottom layer) when different images are intended to be used.
- Print & Cut – Supported cutters:
- Sandwich Jobs same images: Roll to roll; guillotine/trimmers and flatbed.
- Sandwich Jobs different images: Guillotine/trimmers and flatbed without POSTNET-Code usage.
- All image editing features.
- White intermediate layer generation:
- Opaque full background.
- Half-transparent with/without mask.
- Can use pre-defined Spot Color White information, if existing in design.
- Optionally, white can be defined on Bottom Layer Job images instead of Top.
Good to Know
Preview quality shown on printer front panel.
The thumbnail job image quality, sent to and shown on the printer frond panel can be adjusted under:
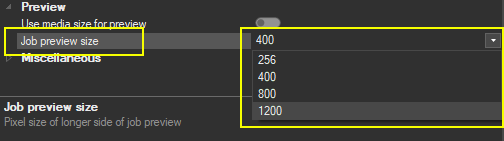
Application Defaults > User Preferences > Job preview size
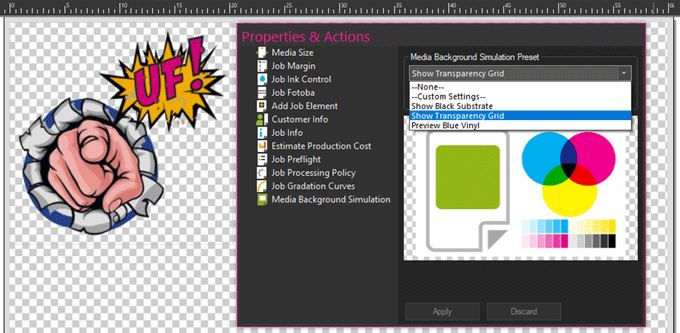
Job Property: Media Background Simulation
Use the Media Background Simulation to identify image transparency and/or simulate the color or pattern of your substrate it is going to be printed on.
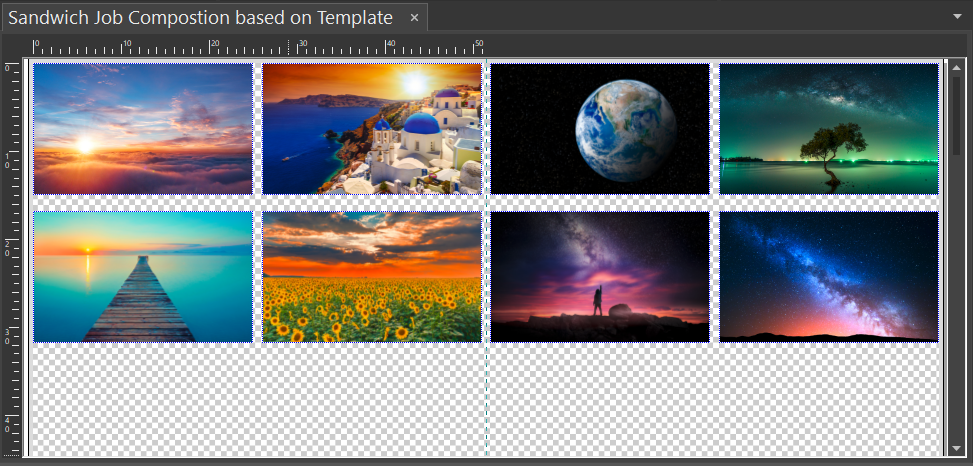
Complex Advanced Sandwich Job Compositions: Position Templates
If more complex advanced Sandwich Job image compositions must frequently be produced, creating a corresponding Position Template with proper placeholder attributes assignments are the most efficient and the least prone to error.
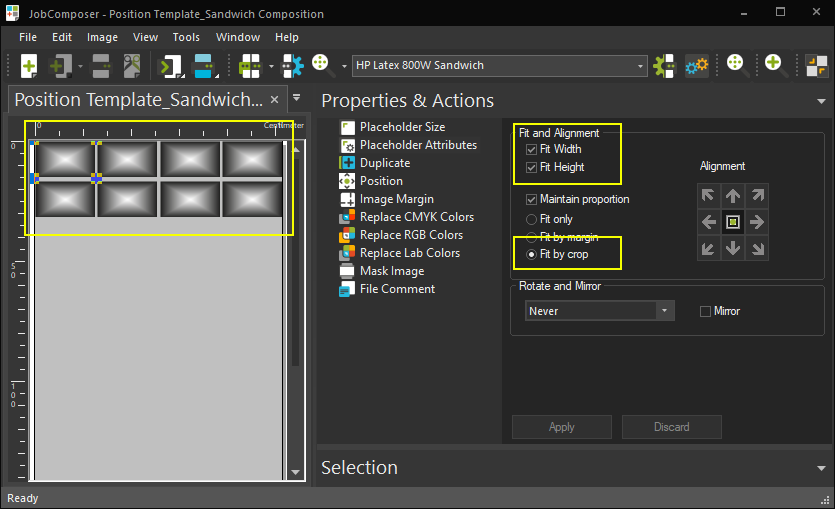
The sample case will ensure:
- Top and Bottom Layer images are the same size (1) through crop (2), if needed.
- Top and Bottom Layer images are positioned correctly (3). Simple drag & drop of the images is needed.
Underflood UF: Use Media Background Simulation
The Job Property Media Background Simulation allows to show a transparency grid or preview a job printing on colored background.
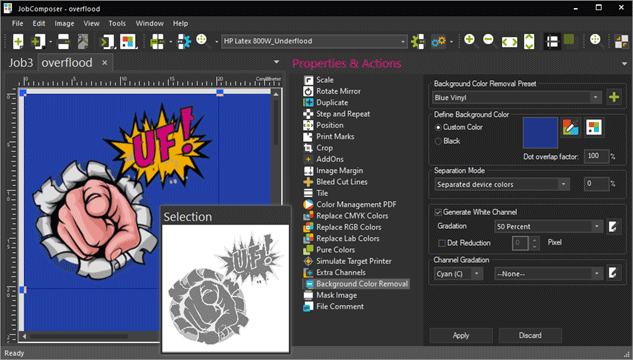
Underflood (UF): Use Background Color Removal Instead of Extra Channels
Especially for the Underflood (UF) mode, if the substrate is colored (or black), using the optional feature Background Color Removal instead of Extra Channels for the white layer generation can be useful.
Related Articles
Printing Separations and Screens
Ergosoft RIP is not only a powerful tool for direct large format inkjet printing, it can also assist in traditional screen or offset printing applications by creating color separations for film and screens. This way you can automatically create color ...Mimaki UCJV Series: Day & Night / Double Sided Printing
This document gives an introduction into configuring a Print Environment of a Mimaki UCJV-150/300 for a Day & Night print and using the double-sided job layout. Add and Configure Mimaki UCJV-150/300 Retrieve print modes and dot size volumes from the ...Epson SureColor SC-S806x0 Double Side Layer Printing
This article gives an introduction into configuring a Print Environment of an Epson SureColor SC-806x0 to print double side layer jobs, using different images on the top layer and bottom layer areas. Add and Configure Epson SureColor SC-S806x0 Add a ...Printing White Ink or Finish
For this article, we will use white printing as the primary example, but all the steps also apply to printing similar special fluids such as primer, varnish, etc. Simply adapt the Printing Ink Assignment to reflect the proper type of fluid. General ...Roland VersaUV LEC2 Series Double Side Layer Printing
This document gives an introduction into configuring a Print Environment of an Roland VersaUV LEC2 Series to print double side layer jobs, using different images on the top layer and bottom layer areas. Add and Configure Roland VersaUV LEC2 Series ...