Pure Colors
One of the clever little tools ErgoSoft RIP users have at their disposal to exert more control over the colors they are printing. Pure Colors lets you tell the RIP that certain colors should only be printed using their respective ink. So for example if you dont want dots of other colors to be mixed in when printing magenta, simply activate Pure Colors for magenta and the ErgoSoft RIP will ensure that magenta areas in image files will be printed using only magenta ink.
Of course using Pure Colors needs a corresponding pure ink available, so colors that appear as mixed colors in a file can’t be used with Pure Colors.
Currently Pure Colors supports the following colors: Cyan, Magenta, Yellow, Black, Gray, White, Red, Green, Blue.
Setting up your Image File for Pure Colors
In order for Pure Colors to work, the respective colors have to appear in the image file as full colors so the RIP can identify them and print them accordingly. You can slightly adjust how strict the criteria for the recipes are by using the Tolerance parameter in the Pure Colors dialog. The recipes are of course different depending on wether you are using a CMYK or an RGB file. The color recipes for CMYK and RGB are:
CMYK Value | RGB Value | |
Cyan | 100% C | 255 G + 255 B |
Magenta | 100% M | 255 R + 255 B |
Yellow | 100% Y | 255R + 255 G |
Red | 100% M + 100% Y | 255 R |
Green | 100% C + 100% Y | 255 G |
Blue | 100% C + 100% M | 255 B |
White | All values 0% | All values 255 |
Gray | Any % K | R + G + B with same value |
Black | 100% K | All values 0 |
Make sure that the colors you want to print as Pure Colors are set up with the corresponding recipe, otherwise they won’t be recognized as full colors and will be printed using a mixture of colors.
Now we have to activate Pure Colors in the RIP itself. Depending on how you want to use it, there are 3 ways to do this:
Activating Pure Colors for an Image
Once you have set up your image file as outlined above, import it into the ErgoSoft RIP. Select it in the JobComposer and go to Actions & Properties > Pure Colors.
The dialog is fairly simple, you’ll see checkboxes for the different supported colors. Select the colors that you want to use Pure Colors for.
You can also use the Tolerance slider towards the bottom to increase the range of colors that are still detected as the full color tone. This can be helpful if your graphics program applies subtle color changes when saving that cause problems with detecting the colors in Pure Colors.
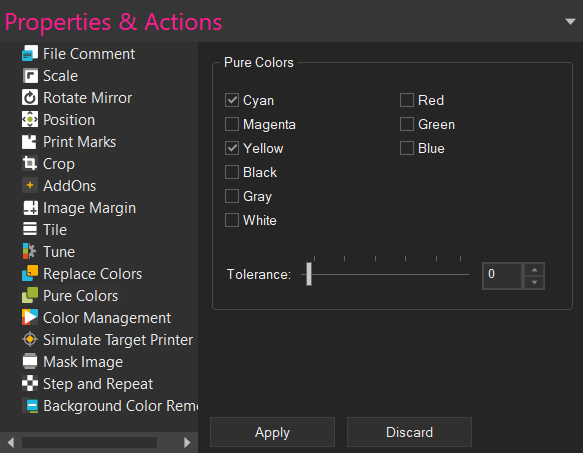
Click Apply to confirm. The Pure Color settings will then be applied to the selected image. That’s it.
You can then simply proceed to print as normal. If the full color recipes are detected in the file, they will automatically be printed with the respective full color ink as specified in Print Settings > Printing Ink Assignment.
Activating Pure Colors globally in Application defaults
If you want Pure Colors to be activated globally so it’s always active for any image, go to Tools > Application Defaults > Color Replacement > Pure Colors.
The dialog is fairly simple, you’ll see checkboxes for the different supported colors. Select the colors that you want to use Pure Colors for.
You can also use the Tolerance slider towards the bottom to increase the range of colors that are still detected as the full color tone. This can be helpful if your graphics program applies subtle color changes when saving that cause problems with detecting the colors in Pure Colors.
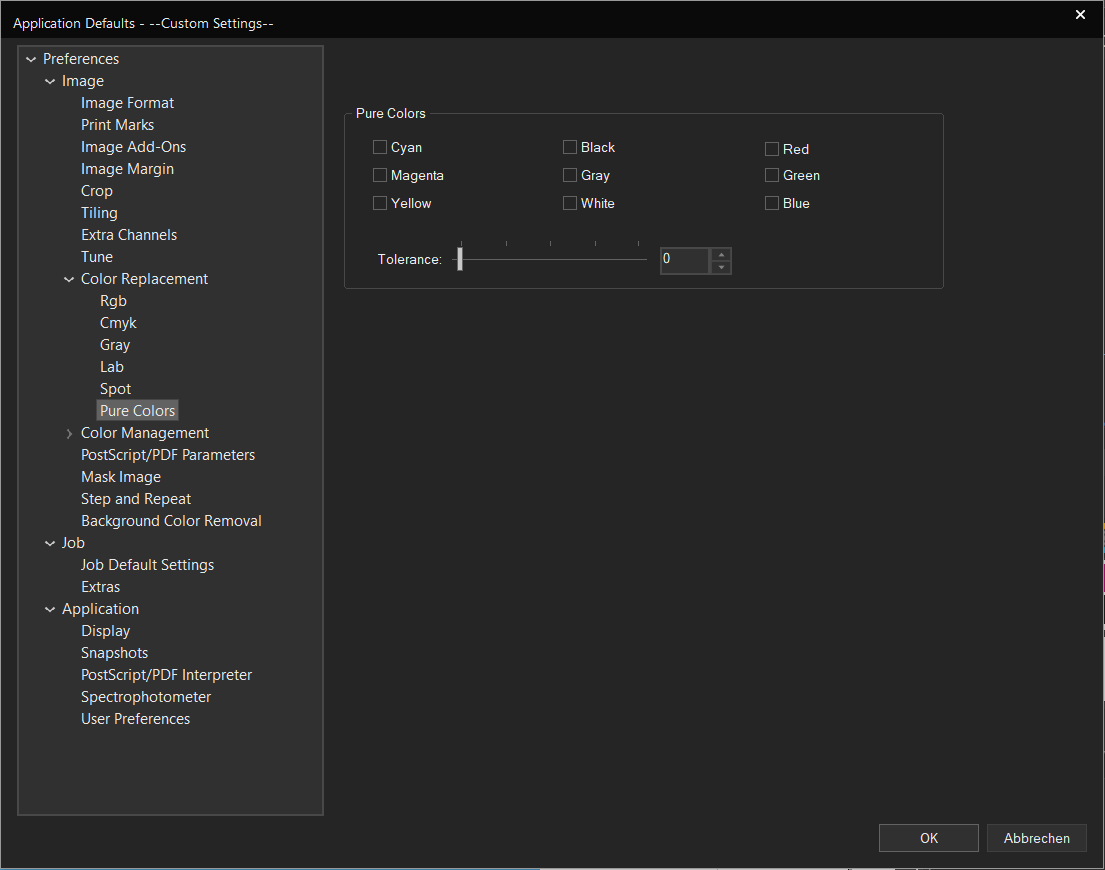
Once you are done, click Ok to confirm.
You can then simply proceed to print as normal. If the full color recipes are detected in the file, they will automatically be printed with the respective full color ink as specified in the Printing Ink Assignment.
Activating Pure Colors in an Image Preset
Pure Colors can also be activated in Image Presets. Set up this way, Pure colors is automatically applied to all suitable images that are imported into the JobComposer as long as the Preset is active, or when the Preset is manually assigned to an image through Right Click > Image Preset > Your Image Preset name.
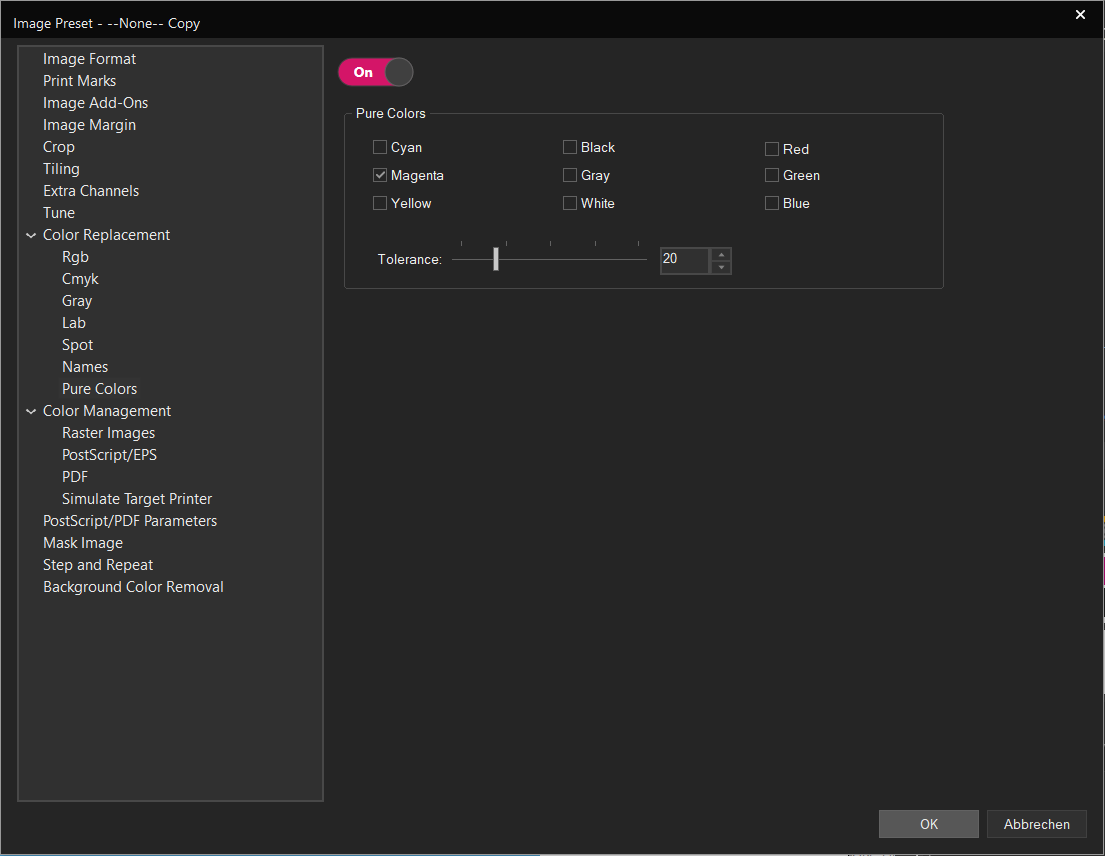
To create a new Image Preset with Pure Colors, either click the New Image Preset button in the Toolbar, or go to Tools > Edit Preset > Composite Presets > Image Preset and click the New button.
The dialog is fairly simple, you’ll see checkboxes for the different supported colors. Select the colors that you want to use Pure Colors for.
You can also use the Tolerance slider towards the bottom to increase the range of colors that are still detected as the full color tone. This can be helpful if your graphics program applies subtle color changes when saving that cause problems with detecting the colors in Pure Colors.
Once you are done, click Ok to confirm.
You can then simply proceed to print as normal. If the Preset is active (Either generally active or applied to the image manually) and the full color recipes are detected in the file, they will automatically be printed with the respective full color ink as specified in the Printing Ink Assignment.
Related Articles
Spot Colors / Named Colors
Spot Color or Named Color printing uses color names in image files to identify the color for color replacement. So for example, you may use a graphic design program such as Adobe Illustrator to specify a spot color name «Spot_Red1» for one of the ...Printer only uses CMYK despite Ink Assignment containing additional colors
Problem/Question Your printer contains additional colors such as Red or Green in addition to CMYK, but does not use them. You are now wondering, “What should I do?” or “Why is that?” Solution/Work-Around The following overview illustrates how input ...Color Spaces
Basics In technical terms, color is defined as a spectrum of wavelength that is reflected from a given object when it is hit by (white) light. White light itself is the combination of all wavelengths of the (visible) spectrum. To express this ...Color Replacement Introduction
Color Replacement is used a variety of different applications in Digital printing. ErgoSoft RIPs offer several different ways to replace colors in your digital printing files for different applications and filetype. Be it pixel replacement in your ...About Application Defaults
Application Defaults deals with the standard settings of Ergosoft RIP. These are the settings that are automatically applied whenever nothing else is set. You can use these to configure automatic operations done to every image when it is imported, ...