Measure Color
With Measure Colors, Ergosoft lets you use your Spectrophotometer to conduct spot measurements of colors and displays their color value. This can be useful if you want to doublecheck the numerical values of a printed color, or pick up a color value for reproduction.
Detecting your Measuring Device
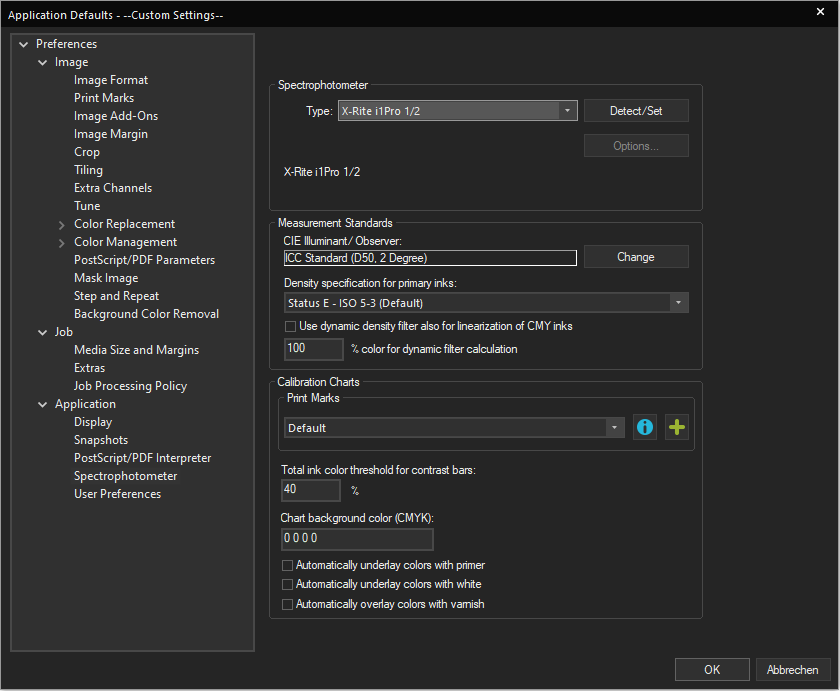
To use Measure Colors, we’ll first need to detect a Spectrophotometer in the software. Go to Tools > Application Defaults > Application > Spectrophotometer. From the Spectrophotometer dropdown menu at the top of the dialog, select the measuring device you are using and click the Detect button. The RIP will establish a connection to your measuring device. If the connection is successful it will display the type and serial number of your device. The other settings in the Spectrophotometer dialog can be left to default in most cases unless you specifically want to use a different measurement standard or if you are using a special application such as white under-printing, primer etc. In that case adjust the settings as required. Confirm with Ok to exit the Application Defaults window.
Starting Measure Colors
To Start Measure Colors, go to Tools > Color & Special Features > Measure Colors. Before actually opening Measure Colors, you might be asked to calibrate the white point of your device (depending on what Spectrophotometer you use). Place the device on the reference field and confirm to calibrate. Once calibration is complete, the Measure Colors dialog will open.
Measuring a Color
Now simply use the device to measure a color. As long as the Measure Colors dialog is open and active it will pick up every measured color and display the color values and information about the color. Note that measuring again will overwrite the previously measured color with the new one.
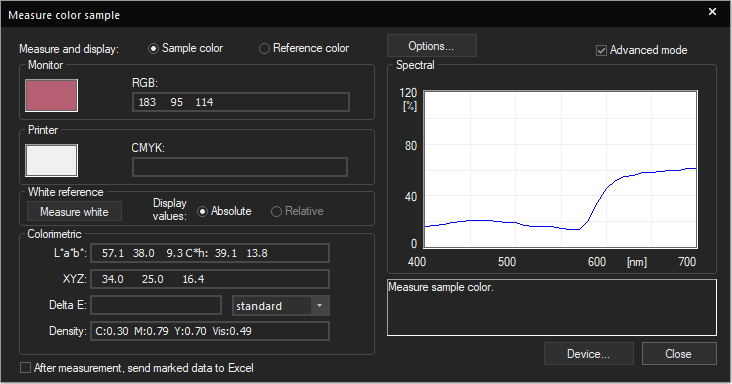
Monitor shows you the RGB value used to display the color on the monitor.
Printer shows you a preview of what values the currently active profile would use to print these colors.
Colorimetric shows you the LAB value of the measured color itself. Check the «Advanced» box at the top right of the dialog to show further information on the color.
Use the Options button at the top of the dialog to change parameters for measuring colors.
Use Device at the bottom of the dialog to detect a different measuring device or re-detect the connected one.
Related Articles
Color Equalizer
The Color Equalizer offers several tools to help you adapt and harmonize the print behavior of several Print Environments and ensure matching outputs. With the Color Equalizer, you can calculate a reference Target Density to ensure the opical density ...Pixel Color Replacement
Probably the method most people think about first when thinking about color replacement. Pixel color replacement uses pixel color values to identify and replace color in an image either by selecting it from the image itself, or by specifying a color ...Create Color Profiles in ColorGPS
After you’ve created the Density Linearization and determined the Total Ink Limit, it’s finally time to move to the Color Profile, the final step in the output calibration of your printer. The Color Profile examines how different color mixtures look ...Spot Color Replacement Preset no longer works after Ergosoft update
Problem/Question After updating Ergosoft, existing Spot Color Replacement Presets may no longer work as expected. You may notice that spot colors are not replaced correctly, even though the preset configuration itself appears unchanged. ...Introduction to Color Management System (CMS / CMM) and ICC Profiles
Color Management System / Module (CMS/CMM) In digital printing combining RGB (matrix-based) or CMYK (LUT based) source ICC profiles with CMYK (LUT based) or RGB (LUT-based) destination ICC profiles leads to the most common profile chain for the ...