Elements and Picture Template
Elements and Picture Template allows you to define a job layout using placeholders. When importing an image into a Elements and Picture Template job, the placeholders are all filled with that one image in different configurations according to the Elements and Picture Template template. This can be useful e.g. for photographers to print sets of portraits with the same photo in different sizes on one big sheet.
No need to set up the job every time or to import the image several times, if you can just set up a Elements and Picture Template, import the image once, and print!
Setting up a Elements and Picture Template
To create a new Elements and Picture Template, go to Tools > Elements and Picture Template > New. This opens a new job with a gray background. You’ll also notice that the Properties & Actions pane changes. The Elements and Picture Template defaults to the media size of your Print Environment, but you can change it in Properties & Actions > Mediasize.
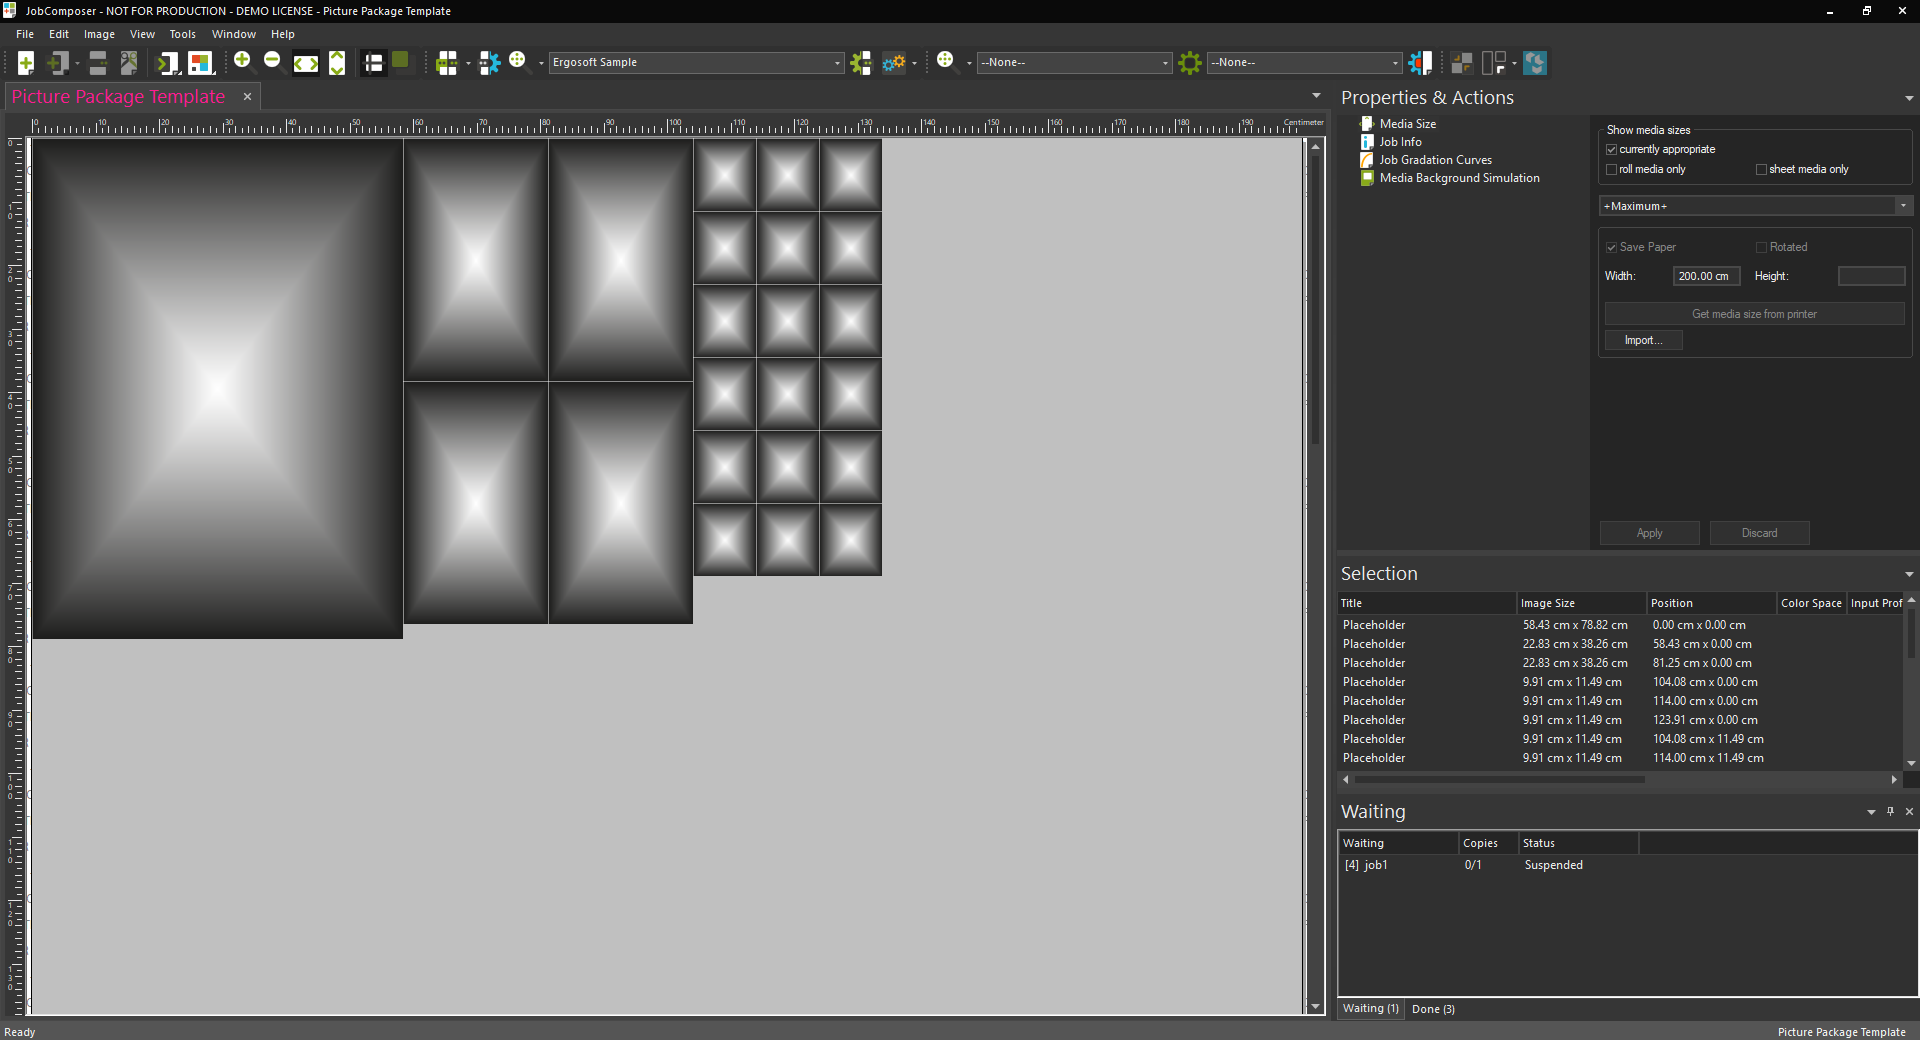
Insert a placeholder go to Right-Click > Insert Placeholder. This will add a grey square with a gradient to the Elements and Picture Template job. You can now scale and position this placeholder as you like, the position of the placeholder will be where images are imported.
Alongside placeholders, you can also add static images by importing them as you would into any regular job (Right click + Import Image, the image import icon in the toolbar or File > Import Image). Images imported into the Picture Template in this way will be loaded into every job created with the template automatically and will not change.
It is also possible to add Job Elements to the Picture Template with Right-Click > Job Elements. The added elements become part of the Picture Template and are automatically included as static objects every time the template is used.
Placeholders and static images inside a Picture Template can also be grouped together by selecting them and pressing Ctrl+G. Images inserted into grouped Placeholders are also automatically grouped. This way you can easily use group-features such as cutting the bounding box of a group with the Picture Template.
Keep adding and editing placeholders until you have achieved your desired layout.
Saving the Elements and Picture Template
Once you are satisfied with your placeholders, click File > Save or File > Save as... to save your Elements and Picture Template.
By default, Elements and Picture Templates are always saved in C:\Users\Public\Documents\EsRip\17\Data\Template\PicturePackages. Elements and Picture Templates need to be stored there to be available for use in the Ergosoft RIP.
Once saved you can close the Elements and Picture Template job.
Using the Elements and Picture Template
To use your new Elements and Picture Template, open a new regular job (white background) and go to Right Click > Elements and Picture Template... Navigate to the picture you want to import and select it. In the segment Elements and Picture Template at the bottom of the dialog, select the Elements and Picture Template template you want to use.

Confirm with Ok. The image you selected is now automatically placed into every placeholder, filling up the entire template.
Export/Import Elements and Picture Templates
Elements and Picture Templates can also be exported to any desired location by going to Tools > Elements and Picture Templates > Export... to export to the default .xml format, or to Tools > Elements and Picture Templates > Export DXF... to export to .dxf format. Exported Elements and Picture Templates can also be imported again using Tools > Elements and Picture Templates > Import. But note that in order for Elements and Picture Template to be accessible in the software (e.g. through Right Click > Elements and Picture Template) they need to be stored in the default save folder C:\Users\Public\Documents\EsRip\17\Data\Template\PicturePackages.
Related Articles
Position Template
Position templates are Job Templates that specify placeholder positions for images. Images imported into the job will automatically be placed into these placeholder positions. The placeholders can dictate different attributes for how the images ...About Job Elements
Job Elements These are configurable Elements that can be added to any Job to serve a multitude of functions. Job Elements include customizable barcodes, text fields, rectangle, separation lines. Once added, Job Elements can be edited and manipulated ...Position Templates
With Position Templates, you can set up a job layout using placeholders that define the position of images in a job. By applying this template to a job, imported images are automatically placed at the placeholder positions with the attributes of the ...Generate Image Elements
Generate lets you dynamically create elements for a job such as text, barcodes, solid color blocks, gradients, etc. By using the generate tag, these elements are created during rastering and can then be handled like regular images, positioning them, ...JobComposer: The default size of menu and Job & Image Property entries has changed since 17.6
New Default Size for Job & Image Property Icons Since V17.6 the default size of menu and Job & Image Property entries has changed to "Medium". Therefore, new installations of Ergosoft will show 'medium' sized icons, instead of the previous default ...