Position Templates
With Position Templates, you can set up a job layout using placeholders that define the position of images in a job. By applying this template to a job, imported images are automatically placed at the placeholder positions with the attributes of the placeholder.
An easy example would be a T-Shirt print that requires the image to always be at the center of the chest, scaled to a specific size. For this you can set up a Position Template with one placeholder in the center of the job and an attribute to scale any image to the placeholders size. You can then simply load this placeholder in every job and import your image, instead of having to manually position and scale every job.
Setting up a Position Template
To create a new Position Template, go to Tools > Position Template > New. This opens a new job with a gray background. You’ll also notice that the Properties & Actions pane changes. The Position Template defaults to the media size of your Print Environment, but you can change it in Properties & Actions > Mediasize.
Insert a Placeholder go to Right-Click > Insert Placeholder. This will add a grey square with a gradient to the Position Template job. You can now scale and position this placeholder as you like, the position of the placeholder will be where images are imported.
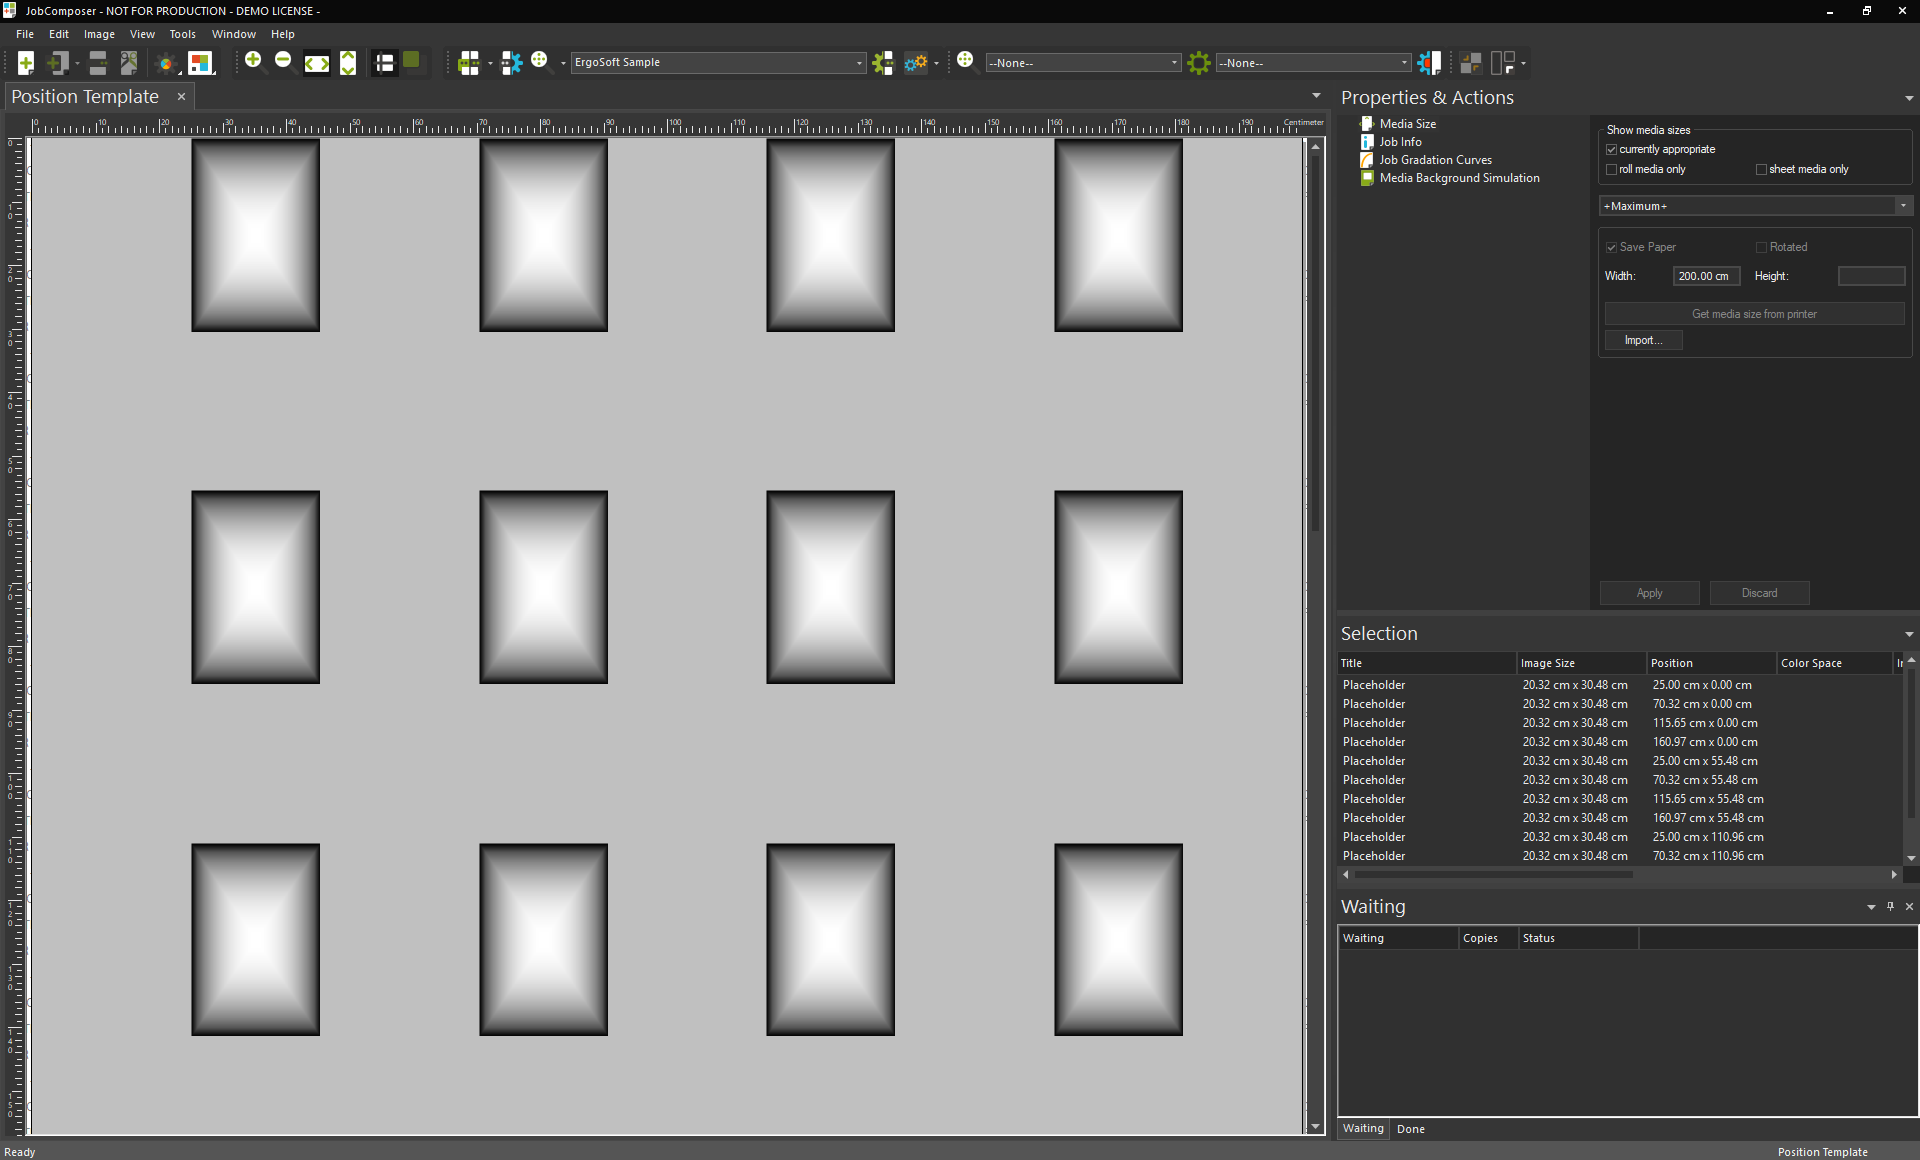
You can of course create mutliple placeholders in one Position Template and configure each individually.
Alongside placeholders, you can also add static images by importing them as you would into any regular job (Right click + Import Image, the image import icon in the toolbar or File > Import Image). Images imported into the Position Template in this way will be loaded into every job created with the template automatically and will not change.
It is also possible to add Job Elements to the Position Template with Right-Click > Job Elements. The added elements become part of the Picture Template and are automatically included every time the template is used.
You can also use Dynamic Job Elements in the Position Template (E.g. Barcode with the dynamic tags). These elements will be included when the Position Element is used and then filled out with the correct information at the rastering stage. This allows for powerful applications such as automatically adding a header section with job information and a barcode with the Job Name or ID to every job that uses the Position Template. For more information on Job Elements and dynamic tags, see Job Elements.
Position Templates also support static images and grouping of static elements. Useful for creating a bounding box around elements that can be used for contour cutting.
Placeholder Properties
With a placeholder selected, you’ll see that Properties & Actions displays several options relating to that placeholder. This way we can control how an image is treated when it is placed into a placeholder using Placeholder Properties.
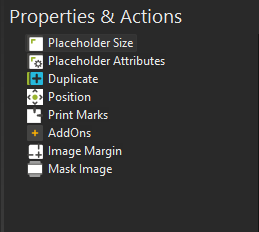
Placeholder Size controls the size of the placeholder itself, you can change this either by dragging the corners of the placeholder or by entering width/height here or selecting an Image Format Preset. Note that this only affects the placeholder, not any images placed into it.
Placeholder Attributes controls how images imported into the placeholder are handled.
- Using Fit Width and Fit Height controls, if the image will be scaled to fit the width and/or the height of the placeholder.
- Maintain Proportion sets, if the image proportions stay the same, or if they may be changed to fit the proportions of the placeholder.
- Background Image: Adds a static background image can be assigned to the placeholders in addition to scaling, fitting, positioning and orientation. Use cases could inlcude assigning a background image with a cut path that is always used to cut this placeholder or combining a static design background element with variable images that are filled into this placeholder.
- Shared Slot ID lets you specify an ID for the placeholder. If an image is dropped into a placeholder, it will automatically also be added to any placeholders with the same ID.
Rotate and Mirror sets, if images placed into the placeholder will be rotated and/or mirrored.
Alignment controls where imported images are aligned in the placeholder.
Duplicate lets you create copies of the selected placeholder and place them along a grid.
Position lets you numerically position the selected placeholder(s).
Print Marks lets you set Print Marks to be used with the placeholder(s)
AddOns can be applied to both Placeholder as well as static objects inside a Position Template. Adding an Addon to a placeholder will automatically add that same AddOn to an image that is inserted into the Placeholder when using the Template to create the Job. To add an AddOn select the Placeholder and in Properties & Actions, select AddOns. Then select an AddOn from the dropdown menu “Image AddOn to be added” and click the green plus to add it. Repeat for all the AddOns you want to use and click Apply to apply the AddOns to your placeholder.
Image Margin sets margins for the placeholder and lets you apply image margins to the placeholder.
Mask Image specifies an image mask to apply to the image placed into the placeholder.
File Comment automatically adds a file comment to the image placed into the placeholder.
Color Management settings can be changed for each individual placeholder by going to Right Click > ColorManagement. This opens up several new application use cases, such as quickly generating hard proofs with different input profiles and/or rendering intents for final customer color approval prior to production. Sample templates can be downloaded from our User Portal > Download > Additional Resources.
You can find more information on each of these functions in the Image Editing & Layout section of this documentation. All attributes set for the placeholder are automatically applied when an image is imported into it.
Saving the Position Template
Once you are satisfied with your placeholders, click File > Save or File > Save as... to save your Position Template.
By default, Position Templates are always saved in C:\Users\Public\Documents\EsRip\17\Data\Template\PositionTemplates. Position Templates need to be stored there to be available for use in the Ergosoft RIP.
Once saved you can close the Position Template Job.
Using the Position Template
To use your new Position Template, open a new regular job (white background) and go to Right Click > Position Template > Your Position Template. After selecting your Position Template, you’ll notice dotted squares appearing the job where you set up your placeholders.
Now you can simply import images into the job. Any imported images are automatically placed in the next free placeholder, going from top-left to bottom right.
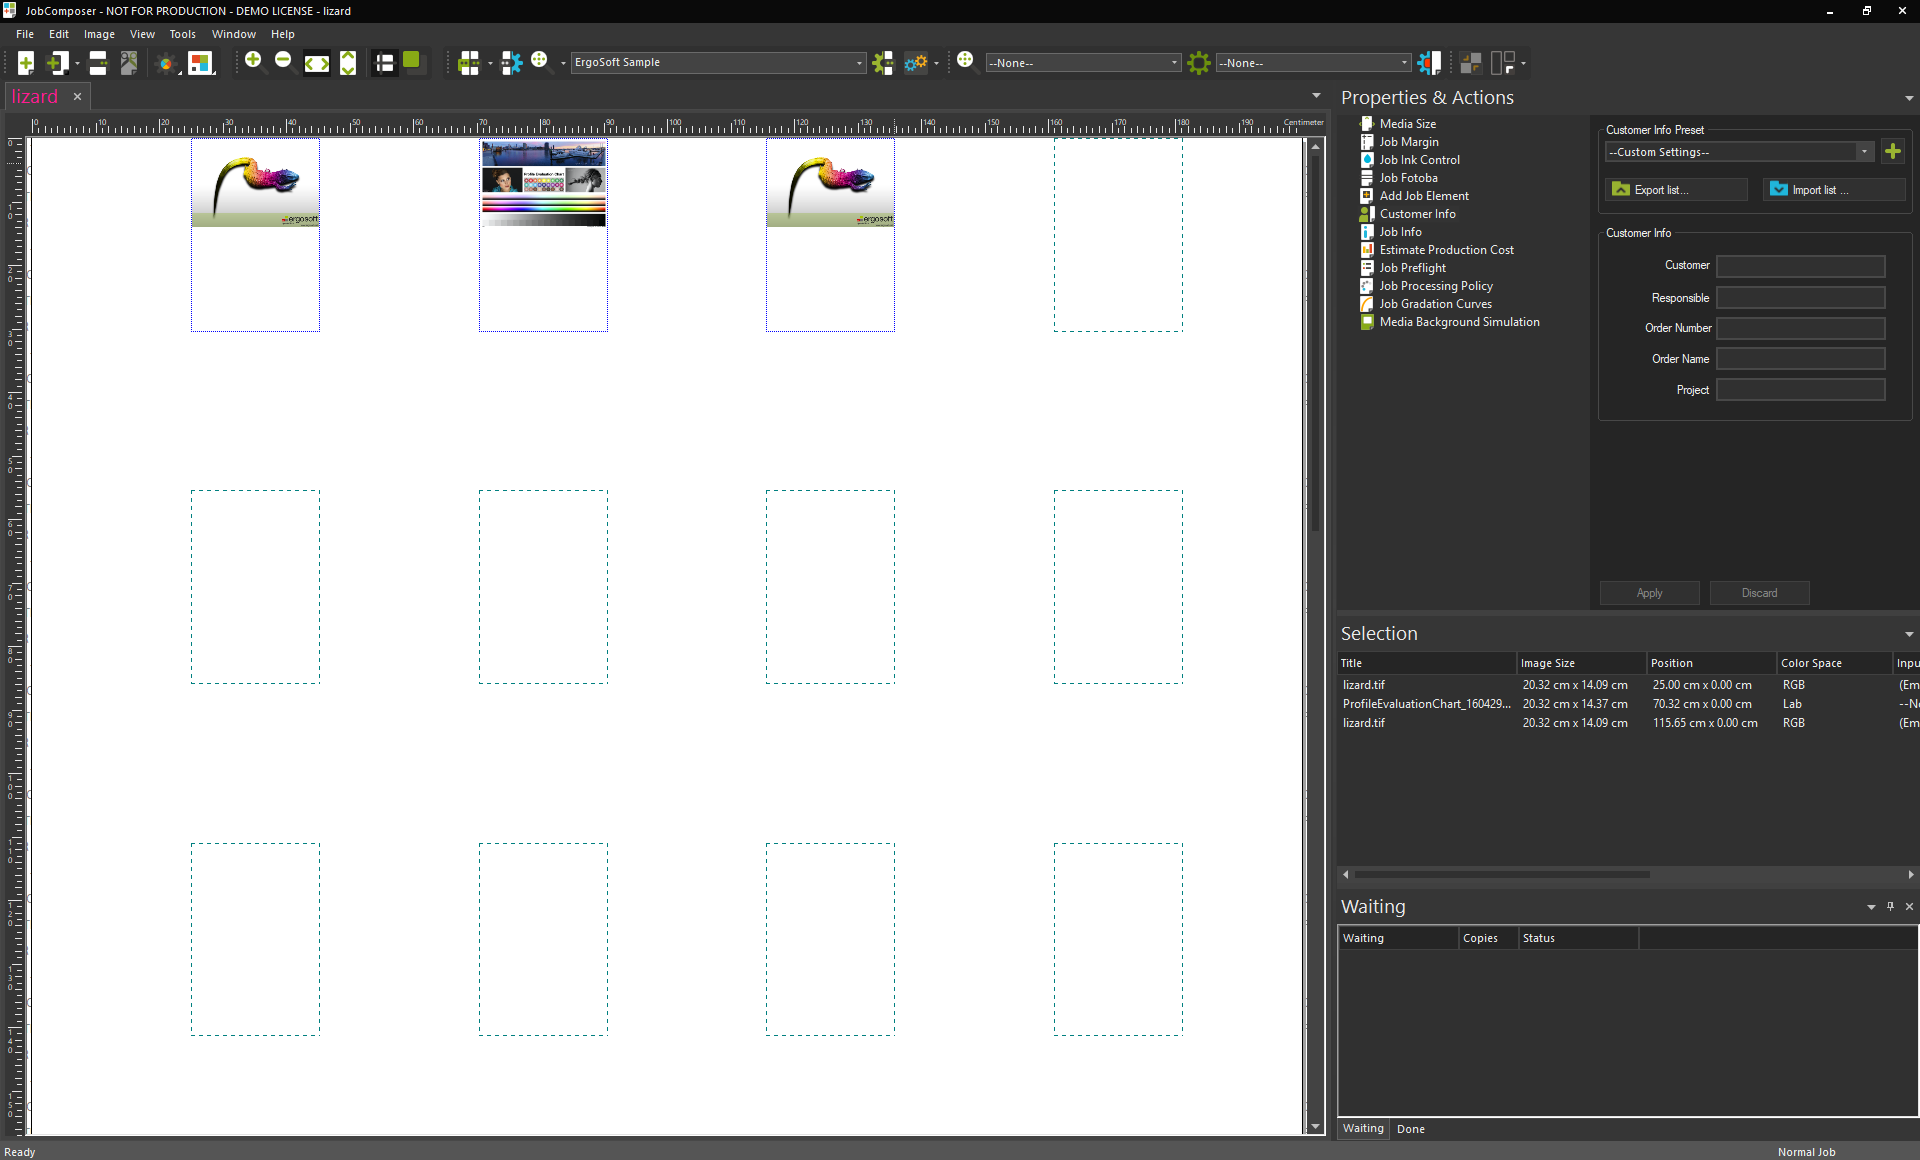
When you drop an image into the Position Template but there is no empty placeholder left, a new job is opened with the predefined Position Template. All subsequent images are placed into the new job and empty placeholders.
Export/Import Options for Position Templates
Position Templates can also be exported to any desired location by going to Tools > Position Templates > Export... to export to the default .xml format, or to Tools > Position Templates > Export DXF... to export to .dxf format. Exported Position Templates can also be imported again using Tools > Position Templates > Import. But note that in order for Position Template to be accessible in the software (e.g. through Right Click > Position Template) they need to be stored in the default save folder C:\Users\Public\Documents\EsRip\17\Data\Template\PositionTemplates.
Related Articles
Position Template
Position templates are Job Templates that specify placeholder positions for images. Images imported into the job will automatically be placed into these placeholder positions. The placeholders can dictate different attributes for how the images ...Elements and Picture Template
Elements and Picture Template allows you to define a job layout using placeholders. When importing an image into a Elements and Picture Template job, the placeholders are all filled with that one image in different configurations according to the ...Import Settings from Ergosoft 15 and 16
Updating from an earlier version of a RIP to a more recent one can seem like a daunting task, but with the following steps you can easily take over your printer configurations and settings from Ergosoft RIP 15 to Ergosoft 17. It is recommended to do ...HotFolder
The Ergosoft HotFolder is a powerful tool for print process automation and batch processing. Automatically create and print standardized print jobs, simply by moving image files into a folder, the HotFolder application will do the rest! The HotFolder ...Jobs from Orders
Jobs from Orders is an automation function of Ergosoft 17 that lets you create jobs based on information in text files. Supply job information such as customer, order ID as well as parameters like number of copies and images (Or image folder) and let ...