Tiling
Tile by Image Preset
Tiling can also be
done through a predefined Image Preset the defines the tile size and position
To use a Preset, select it from the “Tile Preset” dropdown menu and click
“Apply”.
You may also create a new Tile Preset on the fly by clicking the Icon next to the dropdown
menu. For more information on Image Format Presets, see Image Presets.
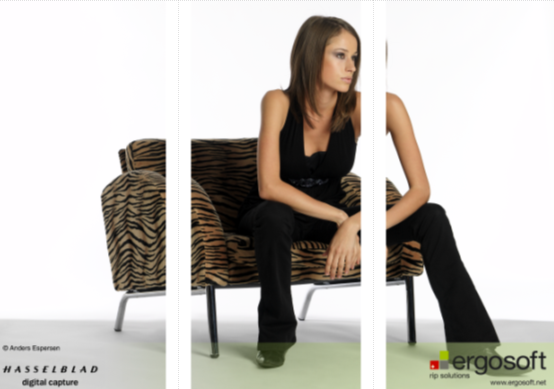
Preview Window
When the Tile dialog
is selected, the JobComposer will display a preview window to show the effect
of the current settings before applying them. The preview Window allows to see
the distribution of tiles with the current settings, but also allows to change
tile size by dragging the separating line between tiles and delete individual
tiles by selecting them and pressing the red X icon. Tiles in the preview
window can be set active or inactive by clicking on them. Click once to
activate one or several tiles. Click again to deselect a tile.
Numerical Tiling Horizontal/Vertical
Tiling is defined through numerical values designating either the width or height of a tile.
To apply tiling to an
image, select the image and go to to Properties & Actions / Tiling.
Tiling can be done
both Horizontally and vertically in their respective Tabs. The options for both
types are the same.
Individual tiles are defined by entering the width/length into the Column
Field. Values may be entered in the form of the measurement unit set in the RIP
or as part fractions for same same sized tiles, e.g. entering 1/3 for the
column in the horizontal tab will create a tile that is a third of the width of
the image. After entering the value confirm with the button or by pressing the
enter key. Any number of tiles can be defined within the width/height of an
image.
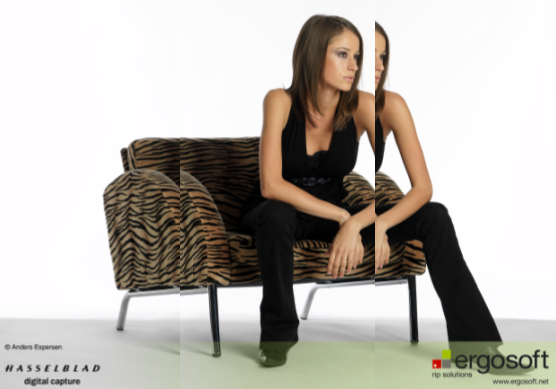
Overlap
Tiling allows to set an Overlap that will extend each individual tile by a set value. This extension can be filled with either white/empty or a mirroring of the adjacent image content. This can be useful if the tiles are intended to be combined back together after printing to allow for an overlap to glue/stitch the tiles.
Fill Options
Fill options set how the overlap area should be filled.
Related Articles
Rotate, Mirror, Scale
Rotate Rotating images is often useful to save media, diversify the print direction on a structured media etc. Note that Printing rotated images consumes more calculation time and therefore can reduce the output speed. To rotate or mirror an image, ...About Application Defaults
Application Defaults deals with the standard settings of Ergosoft RIP. These are the settings that are automatically applied whenever nothing else is set. You can use these to configure automatic operations done to every image when it is imported, ...Composite Preset
Composite Presets Format: <CompositePreset Version=”1”></CompositePreset> Composite Presets are sets of parameters relevant to the image (Such as Size, Rotation, Crop, ColorManagement Settings, etc.) that can be saved to easily be applied to images ...Job Composer
The JobComposer serves as the main program window and Job Layout of the Ergosoft RIP, for many users when the reference the Ergosoft RIP, they mean the Job Composer. The Job Composer can be launched either from its dedicated shortcut in Start > ...ColorCombine
Uses color separations, i.e. color channels separated into individual image files and combines them into a single image by overlaying them on top of each other, coloring each individual layer to create the final image. Similar to the process of ...