Variable Data
In digital printing there are many applications that require printing the same basic motif with just minor alterations or changed elements, such as sports jerseys with the same basic design but changing numbers and names for each shirt. One way to do this would be to prepare each shirt individually as a separate image file and then print each of these in turn, but that sounds time consuming and not very efficient, right?
Lucky Ergosoft has the Variable Data feature that allows you to automatically fill specific placeholders in a template with values from a list and generates print ready images from the data on the fly, directly in the RIP!
You might be familiar with the mail merge feature available in many text editor programs. Variable data is that, but for your print jobs!
So instead of painstakingly creating every single sports jersey and saving it as its own file, Variable Data lets you approach the task diffently:
- You save the jersey design as an individual file and leave out the name, number and any other variable parts.
- You set up a variable data job with the jersey template you created and specify placeholders where the variable elements should be placed.
- You set up a table with the names and player numbers that you want on the shirts.
- Load the variable data template and point it to the file with the data, and the RIP will automatically create a print ready job for each of the data points and automatically fill the placeholders with the data from the table.
By setting up the template once and letting Ergosoft 16 fill in the data from the table, you only need to do the layouting once, and let the RIP create every variation in your production run for you, with just a few clicks!
Variable Data is best explained with a practical example, so in this article, we will run through a specific example and set up a Variable Data template with variable image and text content from start to finish!
Designing a Variable Data Template
To show the capabilities of Variable Data and how to set up a template, we’ll create a run of sports jerseys featuring different logos in the front and player names and player numbers in the back. For this we will use 3 different images: The template for the jersey itself, and 2 team logo images. Everything else we will generate dynamically through Variable Data.
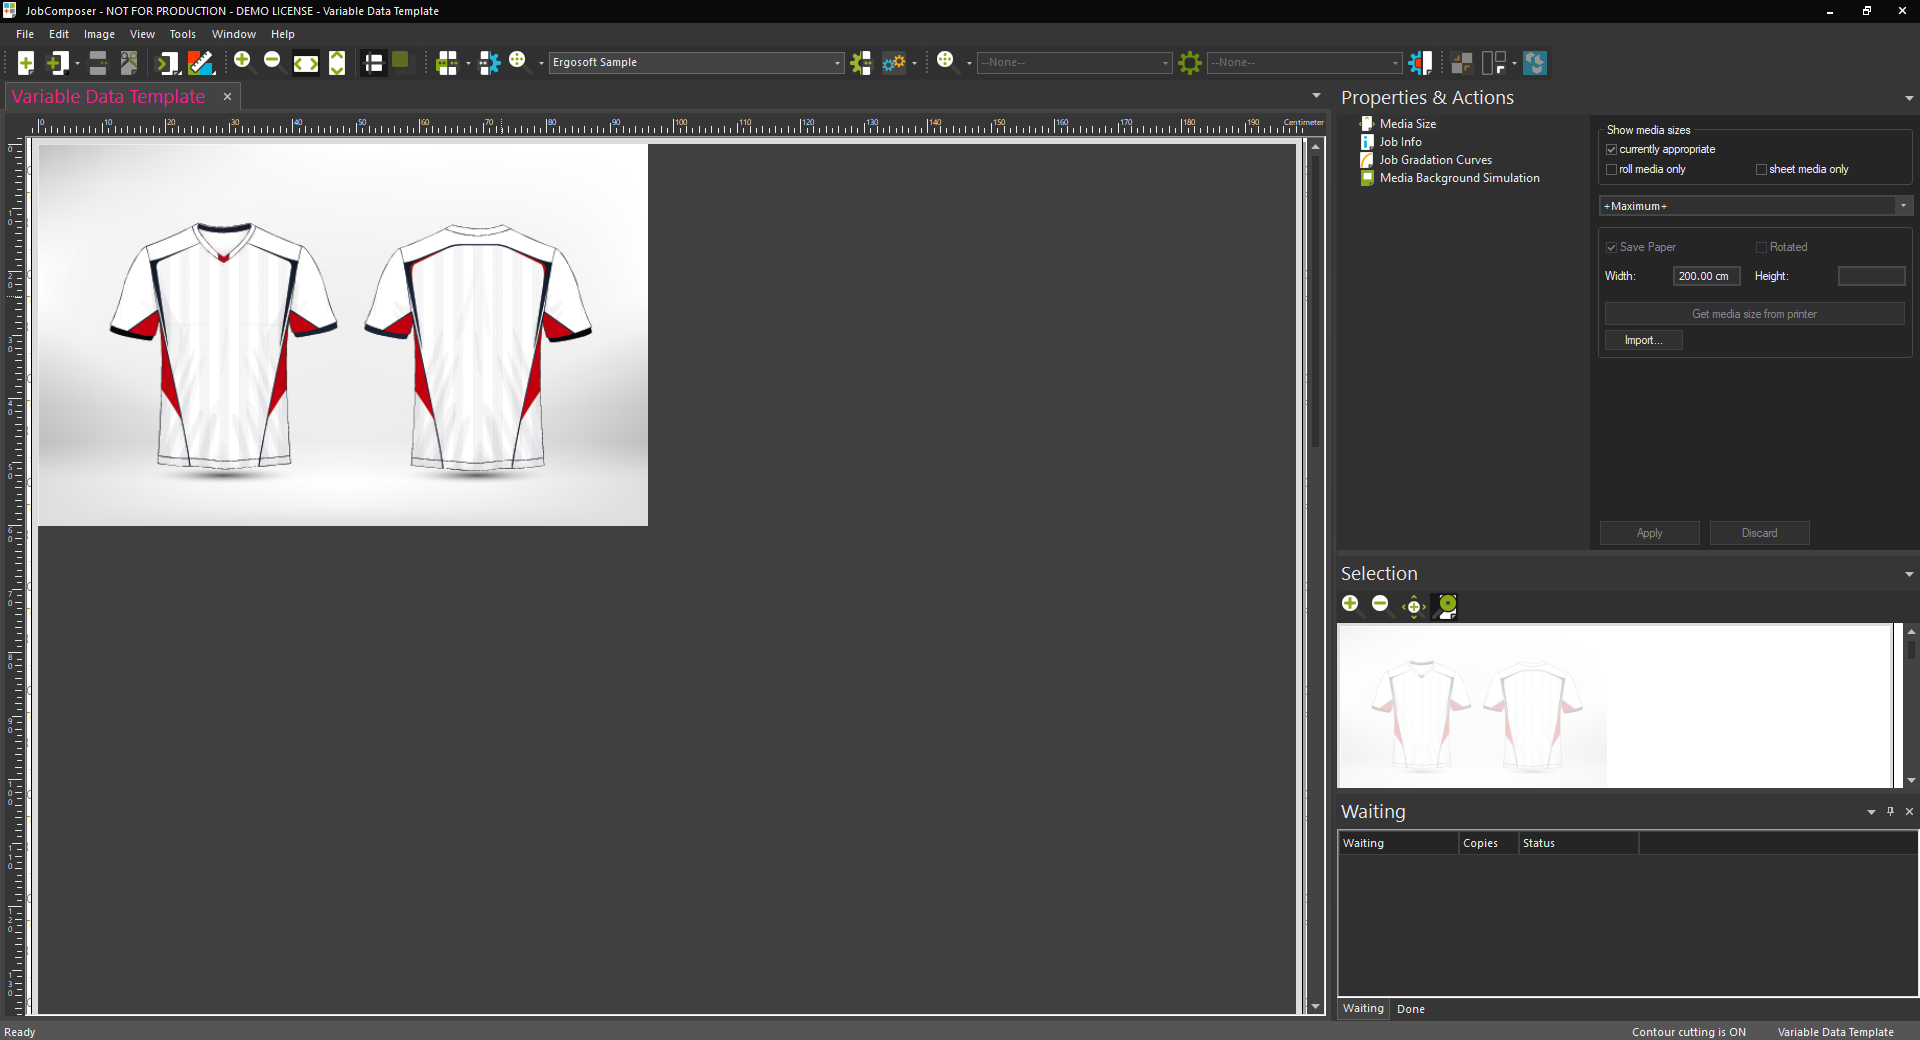
To begin designing your Variable Data template, open the Ergosoft 16 JobComposer and go to Tools > Variable Data Template > New. This will open a new Variable Data Template Job with a solid gray background.
The new template will automatically take the media size of the currently selected Print Environment, but you can change that any time in Properties & Actions > Media Size.
You can treat the Variable Data template job like any other job, with the added feature that we can set some elements to be placeholders, i.e. variable. We’ll later have the RIP dynamically replace these variable elements based on information in an external table/text file.
Start by importing an image into the Variable Data template. In our example, we will use a blank sports jersey motif without logo, name or number. This element won’t change, so we’ll leave it as a constant.
The elements we want to add to the jersey are a logo in the front and text fields for the name an player number. So first, we will next add the variable text placeholders.
Go to Right click > Add Job Element... , in the opening dialog make sure that variable text is selected.
Configure the variable text in the next window as you would like the text to appear in the image (font, size, etc.) and confirm with Ok. For more information on the options in variable text, check out Job Elements.
After confirming, an Attributes window will appear that lets you configure the how this placeholder will be handled by Variable Data.
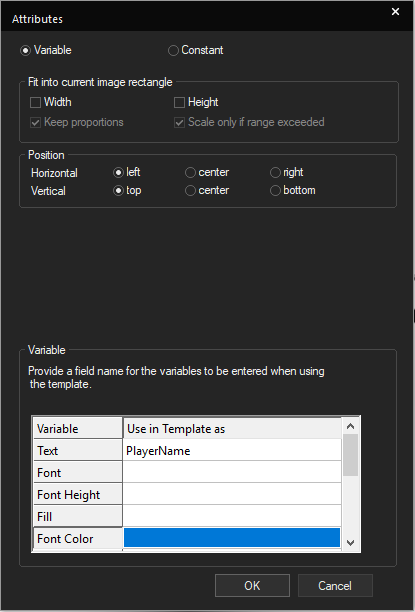
Variable/Constant sets, if the text should be changeable through Variable Data. For this example we’ll set this to Variable.
Fit into current image rectangle controls how variable elements inserted into the placeholder are scaled. This can be by width, height, or both. Based on this fit mode you might also have additional parameters such as Keep Proportions and Scale only if range exceeded available.
Position controls where variable elements are placed within the placeholder boundaries.
Variable controls which parts of the text placeholder should be variable and under what name is used to adress that respective part of the placeholder. This will be the «table heading» for this variable field in your data text file to assign that information to this variable field.
For Variable Text we have Text, Font, Font Height, etc. For each attribute of the placeholder we want to alter, we’ll need to enter a designation. Since we already configured the text to look how we want it we’ll just add PlayerName to the «Text» field and leave the other fields empty.
With the checkbox Add copies column to table you can add the ability to generate multiple copies of each item generated by variable data. This is done by adding an extra column “Copies” to the data table to generate your variable data. Note that this can only be on or off for an entire job. If you turn it on for one element it will be on for all, and if you turn it off it will be off for all.
Confirm with Ok.
You can now move the placeholders to the appropriate position on the jersey template by activating Overlay Mode in the menu bar or holding Alt on your Keyboard while click-dragging the placeholder field. If you need to make additional adjustments to the text or image fields, you can always change the settings by right-clicking on the placeholder and going to either Edit Job Element Parameters or Attributes...
Add a second variable Text field for the player number. Set the size as you like it and configure the attributes the same way and for «Text» set PlayerNumber. Confirm with Ok.
Finally, we’ll add a variable logo to the front of the jersey. For this import an image file using Import Image... You can use one of the variable logo images itself, or whatever image you like since it will be replaced anyway. The image will be imported as a constant by default, so right click on it and Select Attributes. Change the setting at the top from Constant to Variable.
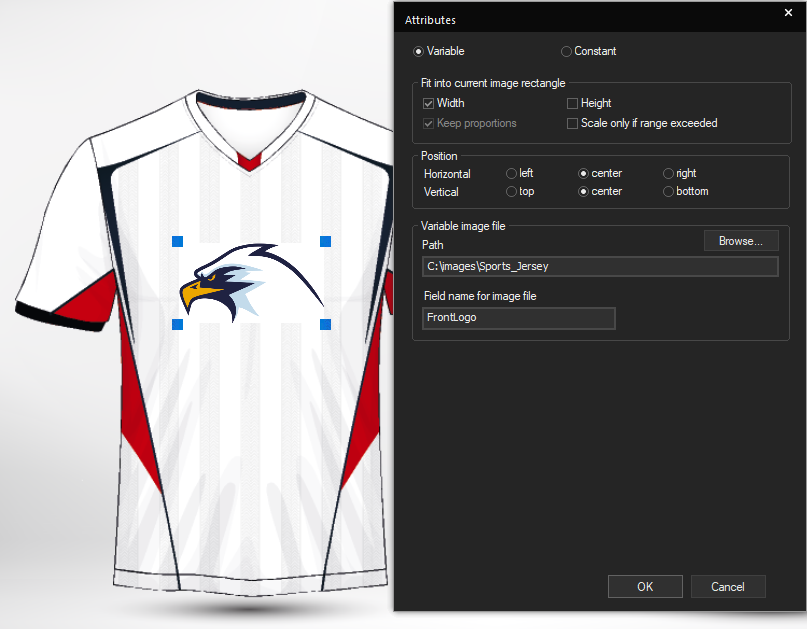
For variable image content, you can make the same adjustments for scaling and positioning as with the variable text.
For the Path setting, click browse and specify the path where the image files are located that will be inserted here. If you have specified you can simply specify a filename in the data text (but you can also enter the full path in the data text to overwrite the path here).
In Field Name for Image File, enter a name to identify this field in the data text file. In this example we’ll use FrontLogo. Confirm with Ok.
Note that you can also use a different type of Job Element such as Barcodes and change out certain parameters such as encoded text via variable data, the basic method is the same.
Now move the image placeholder to the appropriate position on the jersey template by activating Overlay Mode in the menu bar or holding Alt on your keyboard while click-dragging the placeholder field. If you need to make additional adjustments to the text or image fields, you can always change the settings by right-clicking on the placeholder and going to either Edit Job Element Parameters or Attributes...
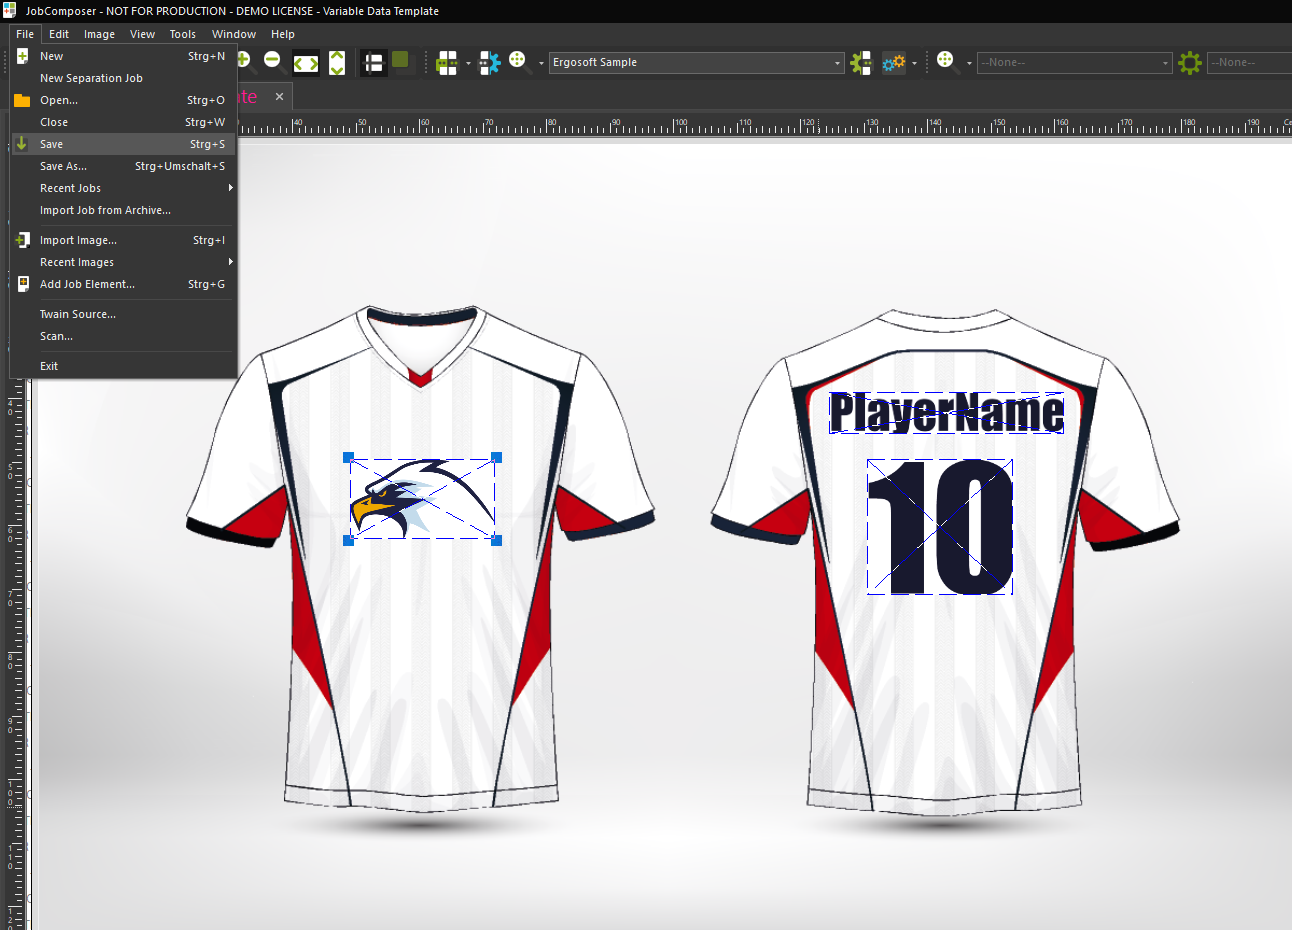
Save the Variable Data template using File > Save.
Setting up the Data Table
Now that we have a Variable Data template, we’ll want to fill it with data and generate print ready jobs for it.
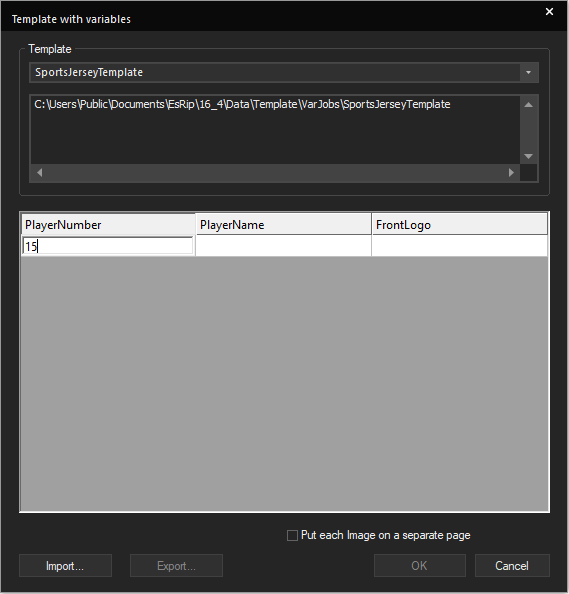
Open up a new, empty job and go to Right Click > Add Variable Data Image... This will bring up the Template with Variables window. The dropdown menu Template at the top lets you select the Variable Data Template you want to use.
Select the one we just set up and you’ll see the fields we previously defined listed in the bottom half of the dialog (FrontLogo, PlayerName, PlayerNumber). This is where we define what comes into the variable placeholders we set up.
If you activated Add copies column to table in the attributes window when setting up your variable data template, you will also see a copies column added here. Simply add a number of copies and variable data will create that amount of copies of that item/line.
From here you can proceed in 2 different ways:
Manual Entry
You can either just manually fill in the fields as desired. Type or copy the values into the respective fields and press Enter or click into an empty area to generate a new line. Do this for all your variations, then confirm with Ok and save the table data with YES when prompted. Ergosoft 16 will now automatically generate an image for each of your data entries in the current job.
Entry by File
The more efficient way is to just fill in one set of data into the table and then use the Export... button to save it to a text file. This will generate a data table file with the correct structure for your variable data template. By default this will be saved in C:\Users\Public\Documents\EsRip\17\Data\Template\VarSets\Variable Data Template. Navigate to this folder and open the txt file. You can now use the structure and fill your data into this text file e.g. by copy&pasting it from another source.

Note that since we defined a path for the logo image files, we only need to enter the image file names here, but we could also specify a full path to a different location.
When you are done, save the text file again and return to the variable data dialog. Click Import... and select the text file you just modified. This will automatically fill the table with the data from the file.
In the future when using this template, you can directly access the text file and prepare the data beforehand, since the structure for this template will remain the same.
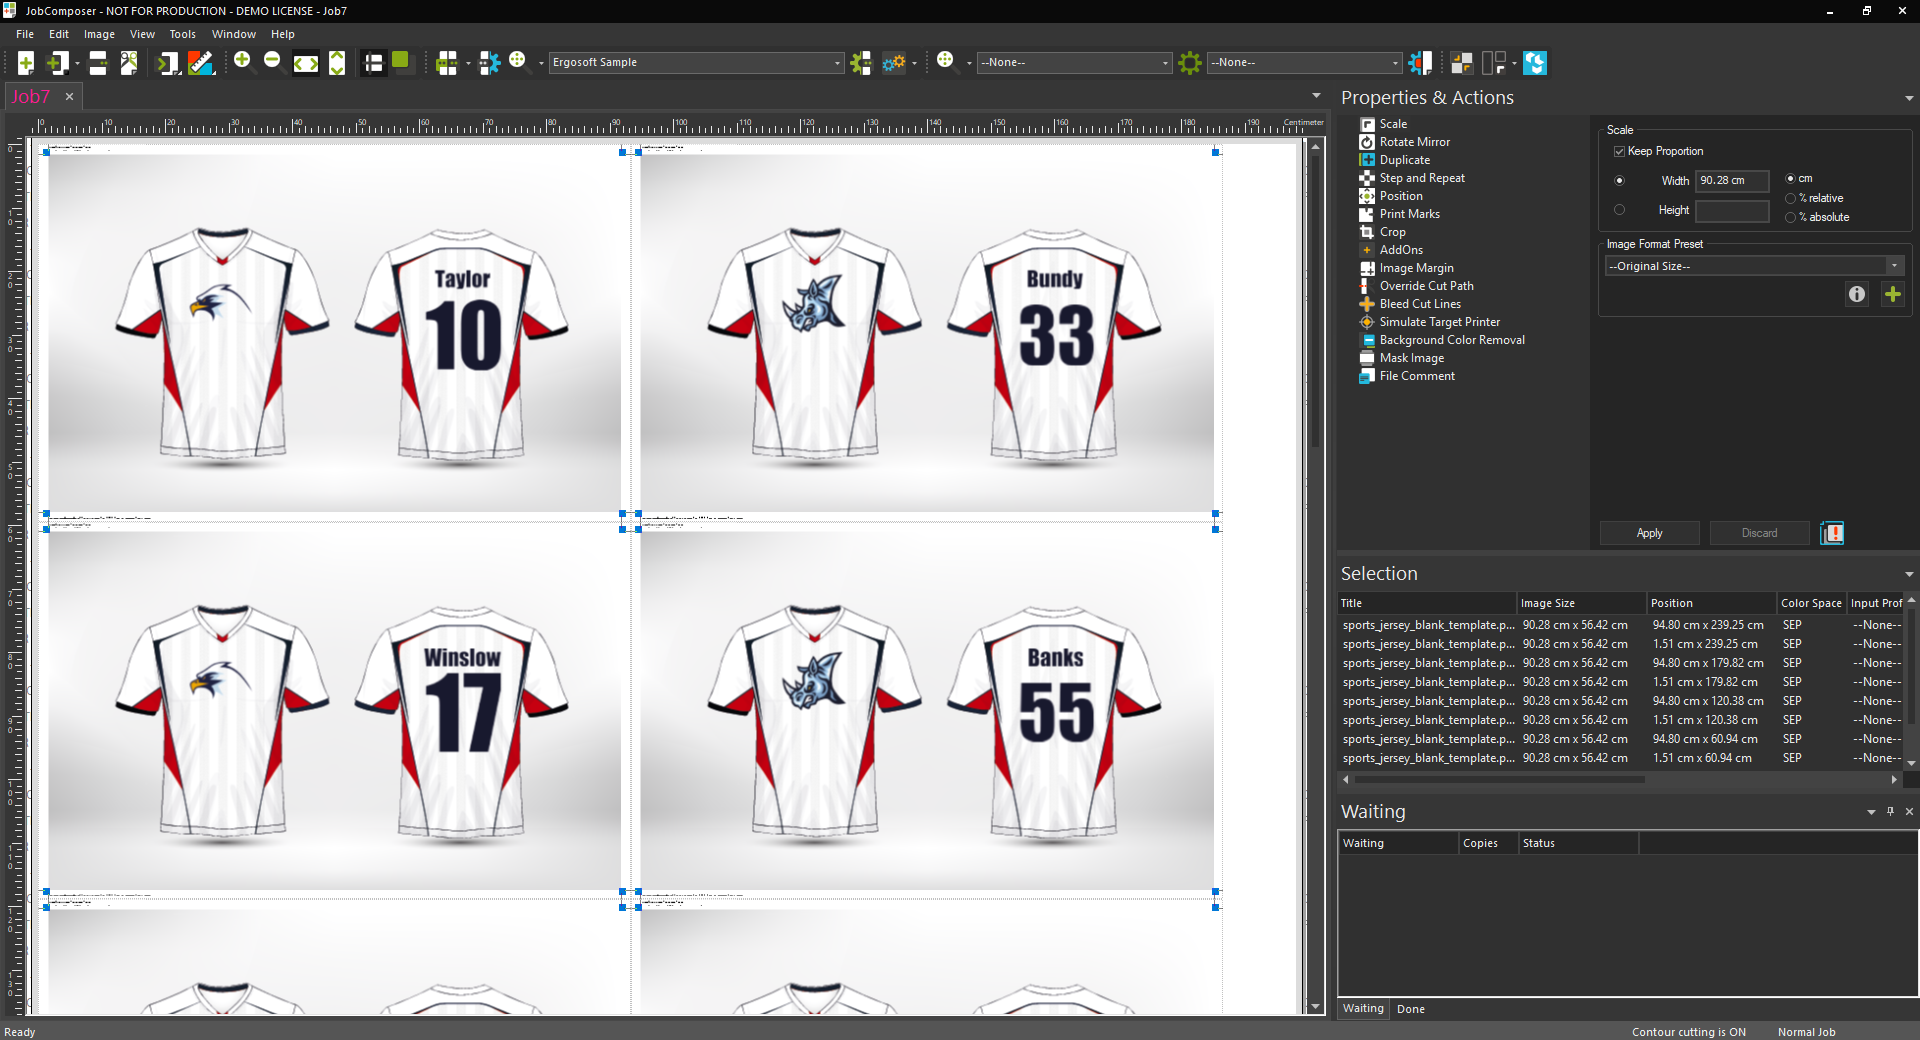
When all the data is imported, confirm with Ok. Ergosoft will now automatically generate an image for each of your data entries in the current job.
Printing the Variable Data Job
From there you can treat the images generated by variable data just like any other image and scale them, rotate, nest, etc. When you are satsfied, click the print button to output your job with the generated images.
Sample Files
You can download the files and Variable Data template we created in this example from here. Simply make sure to copy the files to the appropriate paths on your system:
- C:\Sports_Jersey for the image files (You can create the path if necessary)
- C:\Users\Public\Documents\EsRip\17\Data\Template\VarJobs for the .ppj template file and the .xml file
- C:\Users\Public\Documents\EsRip\17\Data\Template\VarSets\SportsJerseyTemplate for the data text file
Once the files are copied, start Ergosoft RIP and you should be able to select the template from Right Click > Add Variable Data Images...
You can also open the SportsJerseyTemplate.ppj file through Tools > Variable Data Template > Open... to have a look at the template itself and the settings.
Related Articles
Variable Data
Variable Data is used to automatically fill a job with data from an external table file and dynamically create multiple jobs from it. This is done by specifying a template with variable elements in the JobComposer and then automatically filling these ...Data Formats
Images are made up of either pixel data, vector data, or a combination of the two. In the end, both types of data are rendered as pixels on a display device, but the way in which the data is constructed and saved is very different between the two. ...HotFile XML Variable Naming Convention
The most common way to use Delta Automation XML is to build templates for the types of jobs you will be printing where the static parts are already defined and the dynamic parts that will be changed are defined as variables that can easily be ...How to Change Spool Data Folder
Problem/Question How can I change the spool data folder? Why would I need to change the location of my Spool Data Folder? Solution/Work-Around Changing the location of your spool data folder can be easily done from the Control Center. Here are the ...Print Mode (Handling of Rastered Data)
Controls how the job is to be handled after being sent to the job queue. It consists of a a tag to identify the command, and On or Off attributes to turn the respective printmode on and off. The setting defined in the XML file itself overwrites the ...