Ergosoft Networked Departments Installation
Networked Departments is a flexible setup for multiple JobComposers and multiple PrintQueues, offers an end-to-end connectivity and enables you to connect multiple single workstations to a production department where any workstation on the network can prepare and submit jobs to any printer.
It empowers the user with a total production visibility and control via a Central JobQueue and allows to share / update settings between the workstations by using a Share Storage folder.
Preliminary Remarks about the Master-Client-Setup
There are different possibilities how to setup a Networked Departments workstation which you can define according to your individual needs:
- Master and Clients can be used as “Layout Workstations” only, meaning only a JobComposer will be used on such stations and no RipEngines and PrintQueues will be configured on them.
- You can also configure a workstation as “Output Workstation” (RipEngines & PrintQueues) only. The printer ports are configured on such stations (USB, Firewire, TCP/IP, etc.), which leads to a PrintQueue. In addition, RipEngines get set active, while their number of can be further defined according to your requirements.
- The Master and Client workstations can also operate in both roles, “Layout and Output Workstation”, meaning the user can layout jobs and print from the same PC.
- And finally, the “Master Workstation” only. This means that the Master could exclusively be assigned for the communication management of all workers. It basically acts as a black box and is only handling the production database and all communication calls. No actual layout or printing will be done from this station.
Important: There is no “RIP only Workstation” possibility. Ripping is always bound to the local PrintQueues, which makes it to an output station, as described above. We are actively preventing that a RipEngine is ripping a job for another station (where the printer is connected) remotely.
10 Steps to Get You Started with Networked Departments
1. Define which PC should be the Master workstation
This workstation will host the Communication Utility which manages the interaction of the Master PC with Client PC(s), meaning the Client workstation(s) communicate(s) with the master through its Communication Utility.
The Master workstation also holds the Central JobQueue and the production database which allows the centralized production site overview and the production management of all connected workstations.
The Master PC must always be up and running to use Networked Departments on any connected workstation. Otherwise the Client PCs will not be able to launch components or to communicate job information.
Other than uptime and availability, the Master workstation does not need any special hardware, unless you plan to run a JobComposer and/or PrintQueue(s) / CutQueue(s) there. If you do want to use this workstation for ripping and printing jobs, please follow our standard hardware recommendations.
2. Define which PrintQueue(s) and CutQueue(s) should run on which workstation
As each physical printer is represented by exactly one PrintQueue, it is important to think about which workstation each PrintQueue should be running on (this also applies to cut devices). Once chosen, each workstation will become the “output station” for that particular printer / cutter and all direct controls for that device will reside there.
3. Define which PC should host the dongle
The dongle is ideally hosted by the Master workstation, as also the license information must be available all the time and for each workstation in the Networked Departments system, but it can be also located on a Client PC.
It is also possible to designate one PC which should only host the dongle, but not act neither as the Master nor a Client workstation.
4. Define where the Shared Storage should be located
The Shared Storage folder will hold all settings, image and user data, Presets, Print and Cut Environments to be shared between the different workstations.
Like the Master workstation, the Shared Storage must be available for all workstations in the network at any time and all PCs in the Networked Departments setup must have read and write access to this folder. It is ideally placed in a central network location like a NAS or Server, or if local, as a shared folder on the Master workstation.
5. Install and configure the Master workstation
Note: In the following description, we assume that the dongle is hosted by this Master workstation.

Select the desired language for the installation wizard. Then click OK.
Click Next >.
Click I Agree to continue the installation process, if you agree with the License Agreement.

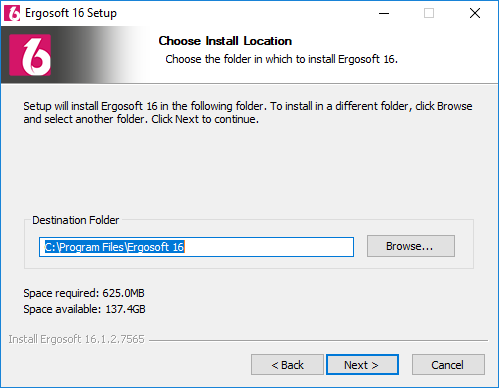
Click Next > to continue the installation process or use the Browse… button to change the install location.
The default destination folder is recommended.
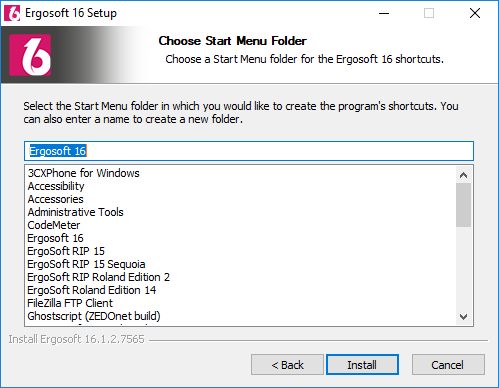
Click Install to start the installation or enter a new name to create a different folder.
The default Start Menu folder is recommended.

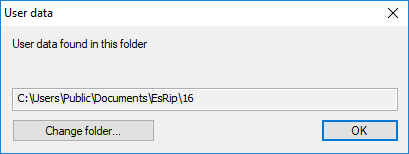
Click OK to continue the installation process or use the Change folder… button to specify a different location.
The default user data folder is recommended.

When the dongle location wizard pops up, make sure that the CodeMeter dongle is plugged into this PC and select CodeMeter dongle is plugged into this PC.
Click Finish. The CodeMeter service will be automatically restarted, and the installation process will continue.
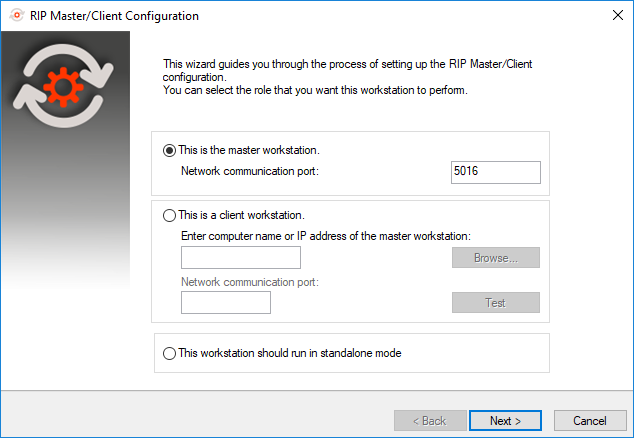
When the RIP Master/Client configuration wizard pops up, select This is the master workstation and click Next > to continue.
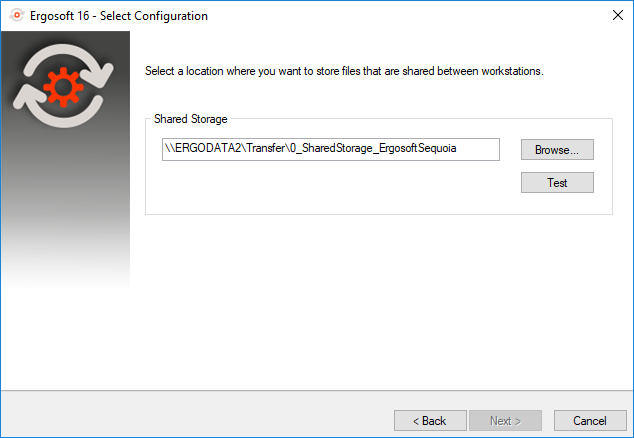
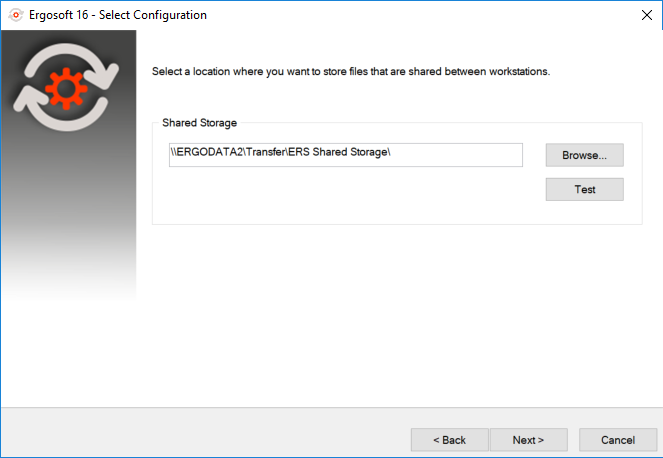
Use the Browse… button to specify the location of the Shared Storage folder.
Make sure that the selected directory is accessible from all other workstations which will be part of the Networked Departments network.

Click Test to check, if the Shared Storage folder is accessible.
The wizard will show a message indicating, if the test was successful or not. Click OK to continue.
Note: Continuing the configuration process is only possible, once the test has succeeded.
If you proceed with the installation without a successful test, the system will automatically install the “standalone” configuration.
Click Next > to continue the configuration process.
Click Finish to finalize the configuration of the Master workstation and to return to the installation process which will automatically continue.
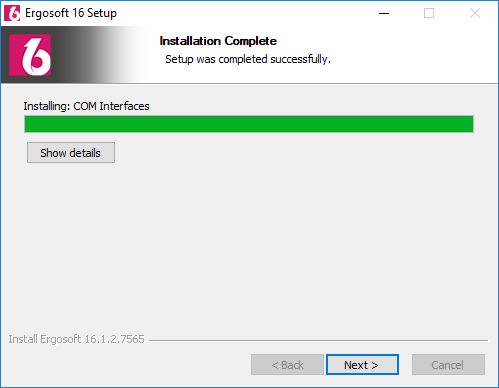
Click Next > to continue the installation wizard.

Click Finish to end the installation wizard and to create a desktop shortcut for the ControlCenter.
The ControlCenter and all required background applications will be started.
Note: Before you begin the process of creating any PrintQueues and Print Environments, complete the software installation on all Client workstations.
6. Install and configure the Client workstation(s)
Note: Please repeat the following process on all required Client workstations.

Select the desired language for the installation wizard. Then click OK.

Click Next >.

Click I Agree to continue the installation process, if you agree with the License Agreement.
Click Next > to continue the installation process or use the Browse… button to change the install location.
The default destination folder is recommended.

Click Install to start the installation or enter a new name to create a different folder.
The default Start Menu folder is recommended.
Click OK to continue the installation process or use the Change folder… button to specify a different location.
The default user data folder is recommended.
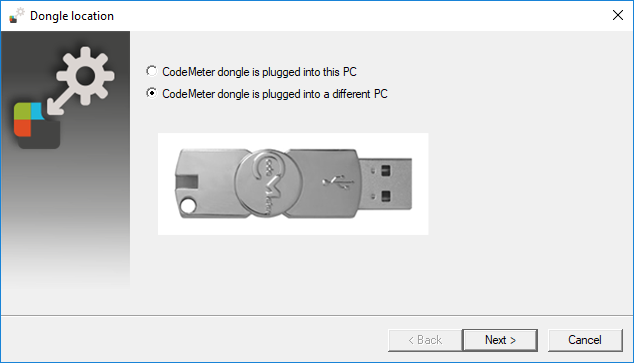
When the dongle location wizard pops up, make sure that the CodeMeter dongle is plugged into the designated PC and select CodeMeter dongle is plugged into a different PC.
Click Next >.
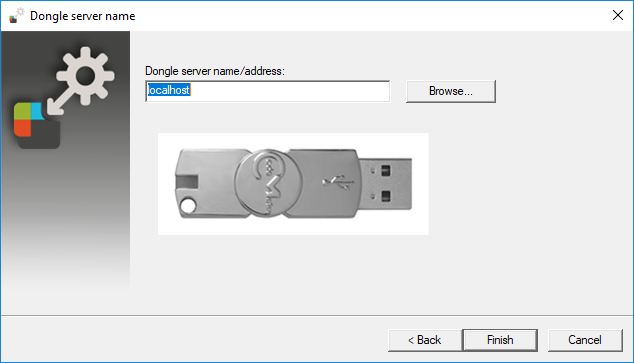
Type in the PC name or IP address of the workstation where the dongle is plugged into or use the Browse… button to search for the PC in your network.
Click Finish. The CodeMeter service will be automatically restarted and the installation process will continue.

When the RIP Master/Client configuration wizard pops up, select This is a client workstation.
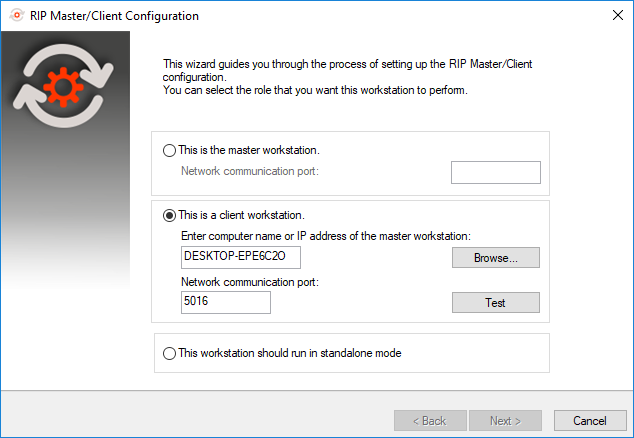
Type in the PC-Name or IP address of the Master workstation or use the Browse… button to search for the PC in your network.
Then click Test to test the connection.
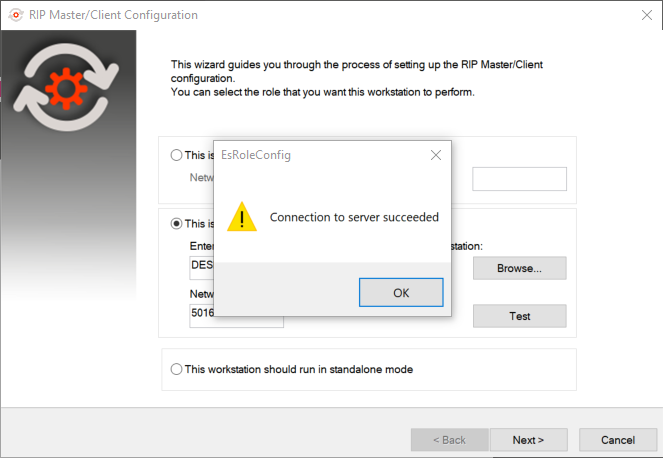
The wizard will show a message indicating, if the test was successful or not. Click OK to continue.
Note: Continuing the configuration process is only possible, once the test has succeeded.
If you proceed with the installation without a successful test, the system will automatically install the “standalone” configuration.
Click Next > to continue.
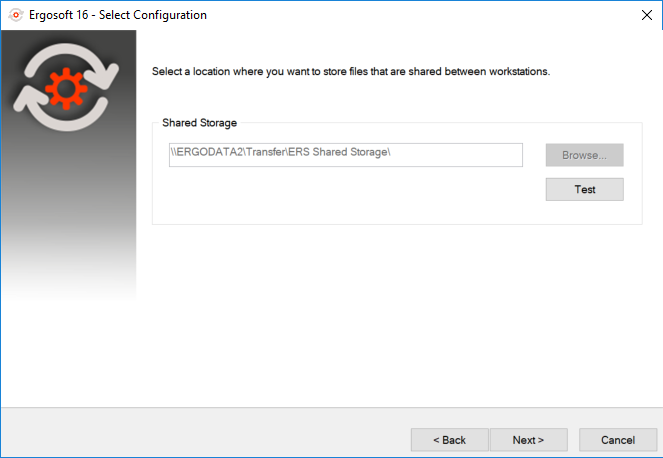
Click Test to check, if the Shared Storage folder is accessible.
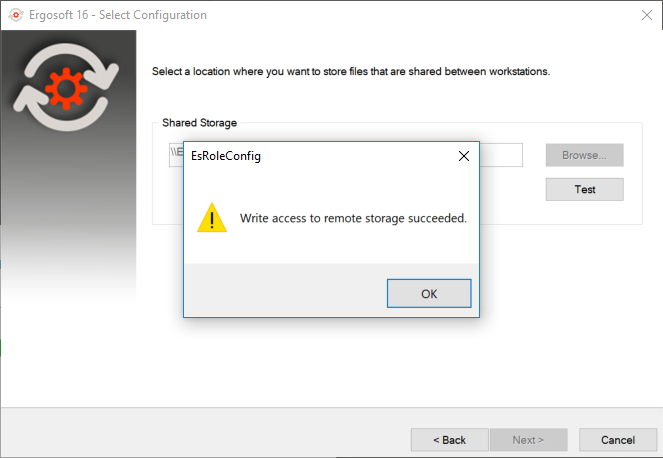
The wizard will show a message indicating, if the test was successful or not. Click OK to continue.
The location of the Shared Storage is automatically communicated from the Master workstation to the Client workstation.
Note: Continuing the configuration process is only possible, once the test has succeeded.
If you proceed with the installation without a successful test, the system will automatically install the “standalone” configuration.
Click Next > to continue the configuration process.

Click Finish to finalize the configuration of the Client workstation and to return to the installation process which will automatically continue.

Click Next > to continue the installation wizard.
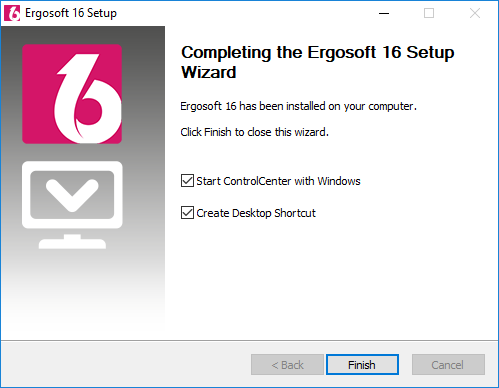
Click Finish to end the installation wizard and to create a desktop shortcut for the ControlCenter.
The ControlCenter and all required background applications will be started.
7. Create the PrintQueues and CutQueues on the specified workstation(s)
Once the Master and Client workstations have been installed and configured, move on to creating the PrintQueues.
PrintQueues need to be setup from the workstation, where they will be run in the future. They will be accessible from all Networked Departments workstations, but the setup can only occur locally on the system, where they will run.
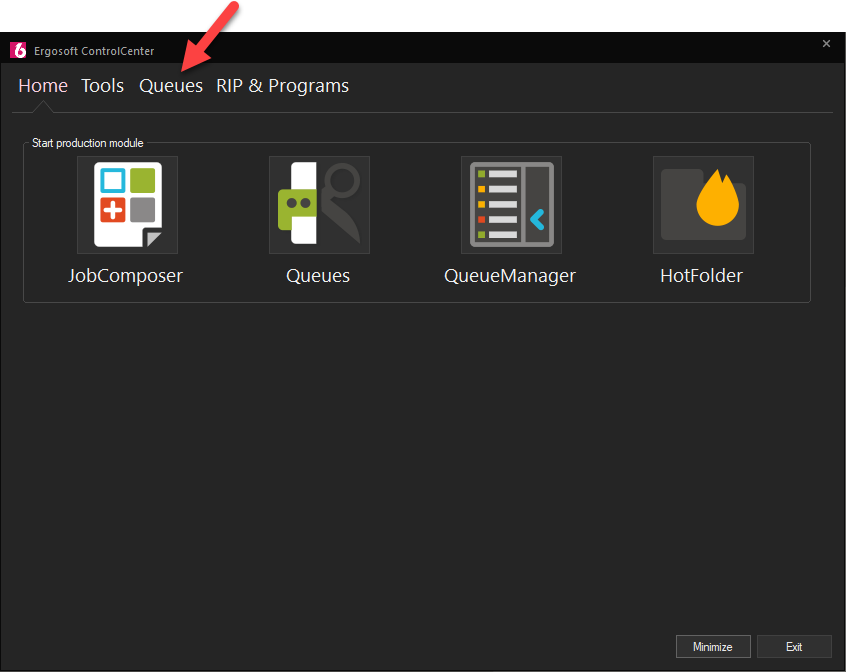
Open the Ergosoft ControlCenter and select the Queues tab.
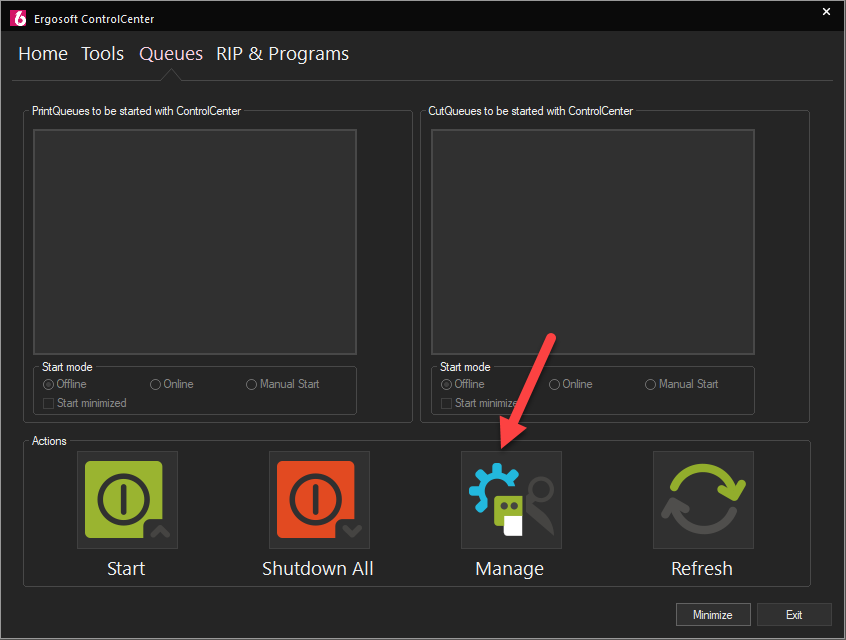
Select Manage to start the process of adding a PrintQueue.
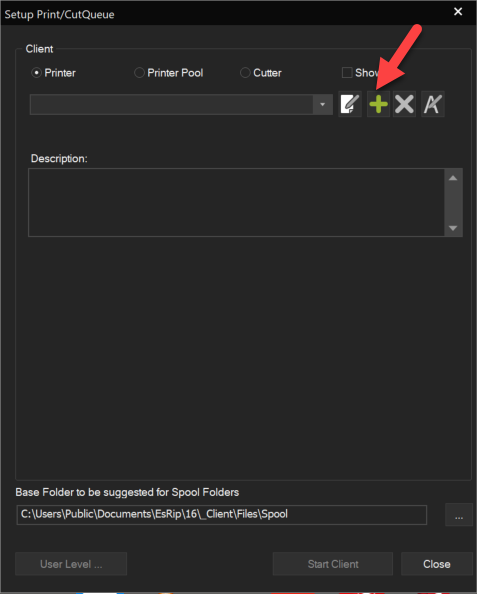
Click on New to add a PrintQueue.
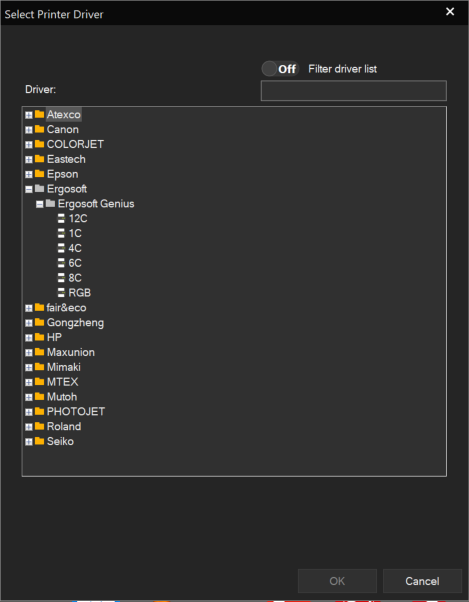
Select the required Printer Driver and click OK.
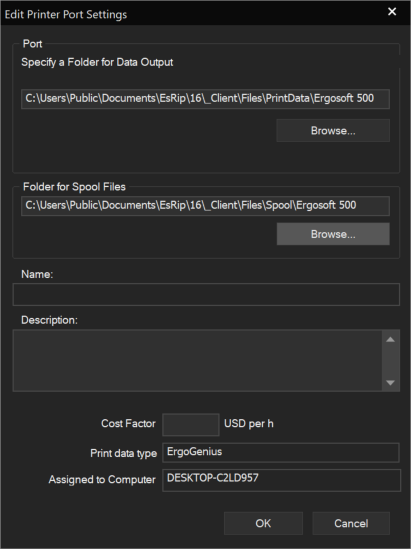
Specify the port of the PrintQueue and click OK.
You can also change the default folder for the spool files using the Browse… button in the “Folder for Spool Files” section.

Enter the name for your PrintQueue and click OK.
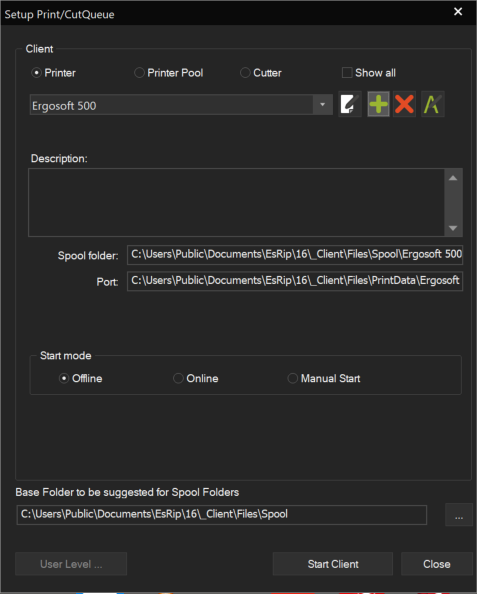
The PrintQueue has been created.
You can continue by adding another Queue or click Start Client to start the client and return to the ControlCenter.
You can also click Close which will return you to the ControlCenter without start a PrintQueue.
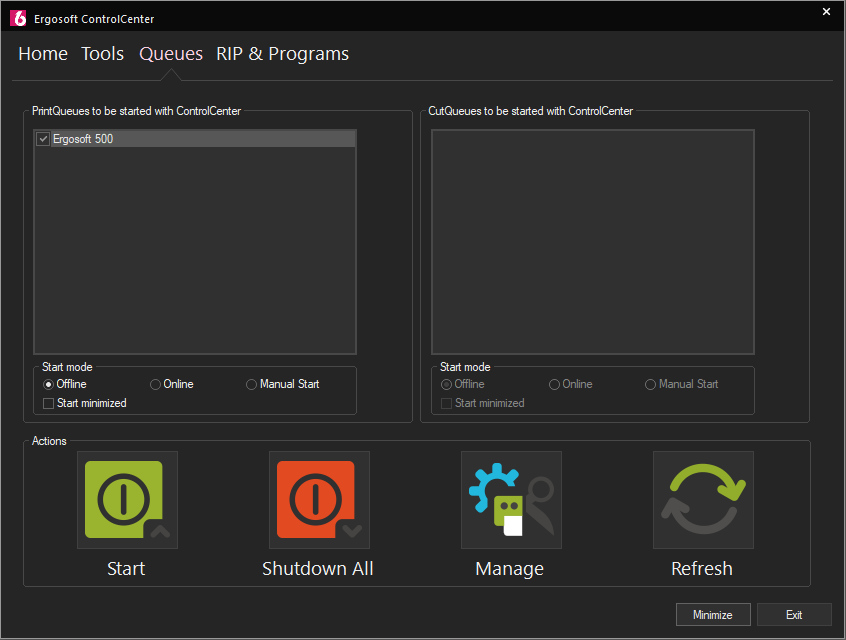
The newly created PrintQueue is now available in the ControlCenter.
Please note that only local PrintQueues will be shown in the ControlCenter and that PrintQueues can only be set to online/offline/manual start on the workstation which they are running on.
Now create any other required PrintQueues on the other workstations.
CutQueues are created in the analogous way.
Note: Once created the PrintQueues and CutQueues are available to all connected workstation to be used as output client for Print Environments. The configuration however is only possible on the local machine, where the PrintQueues / CutQueues have been created.
8.Create (or import) Print Environment(s) via the JobComposer
Once all required PrintQueues and CutQueues have been created, we can launch a JobComposer to create a new Print Environment.
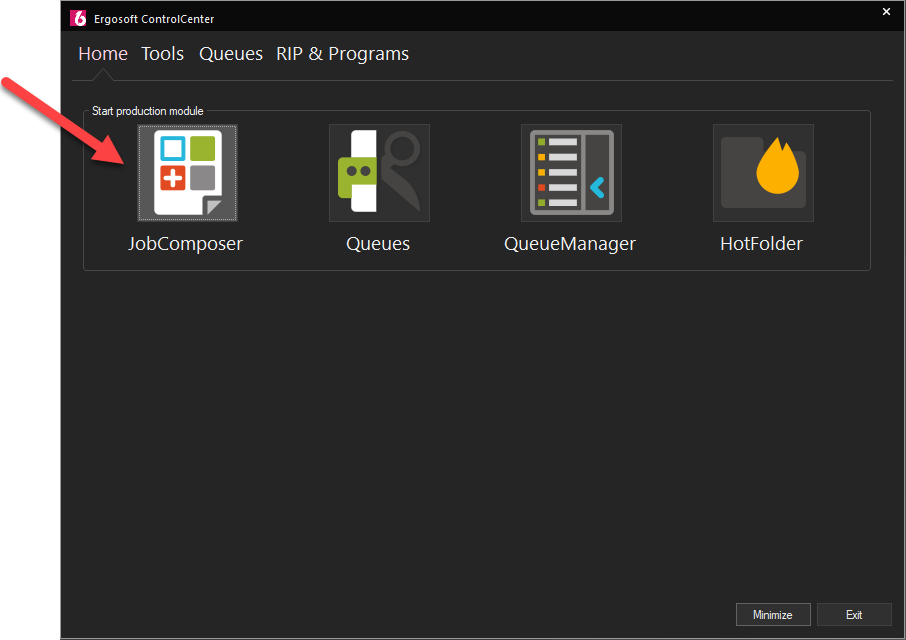
Use the ControlCenter to start a JobComposer instance.
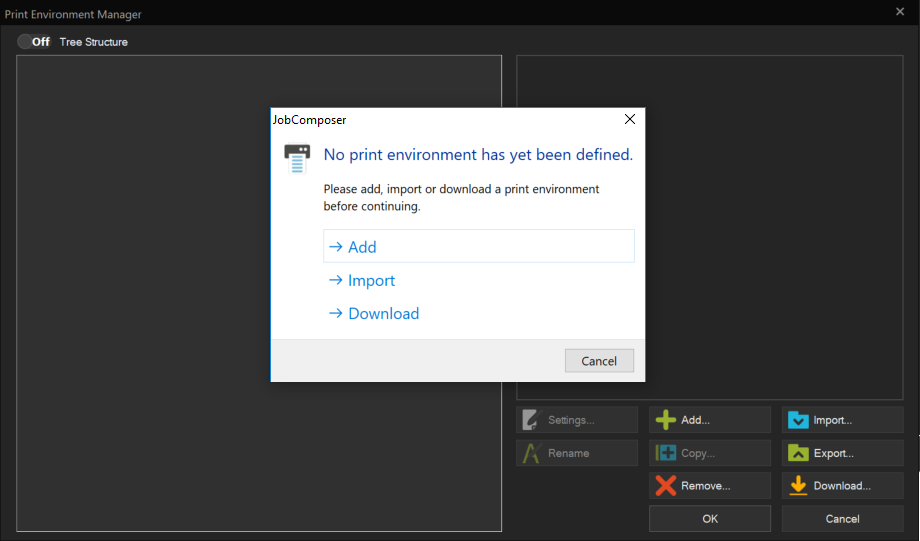
Because no Print Environments are present in a new installation, the Print Environment Manager will appear.
Select Add.
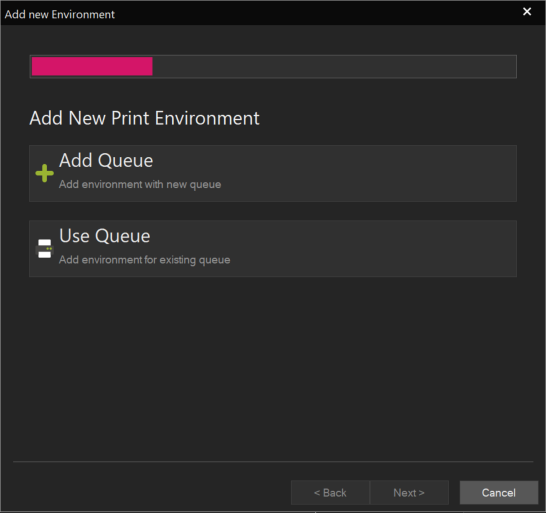
You have the choice between creating a new Queue or using an existing one.
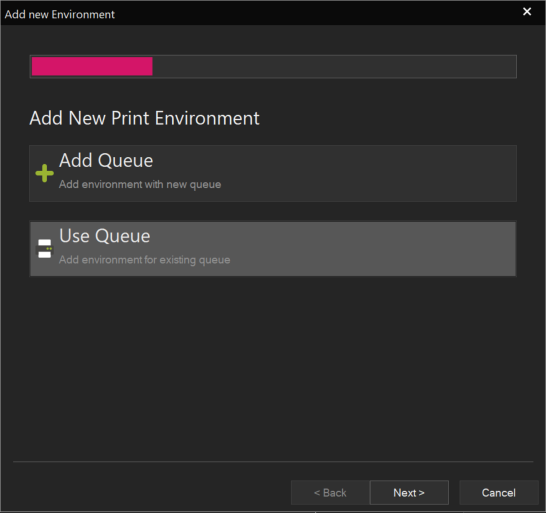
As you created the PrintQueues in the previous step, select Use Queue and click Next >.
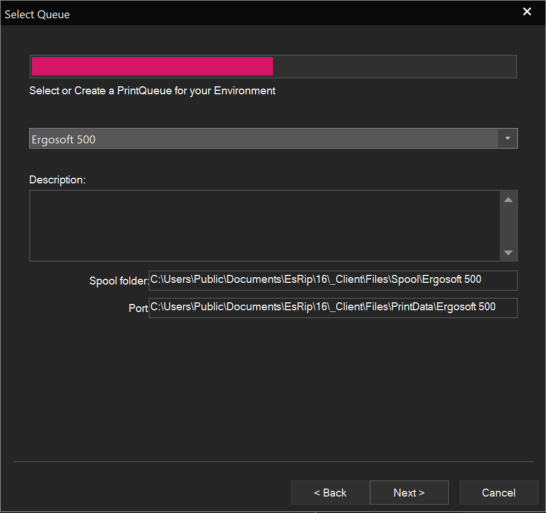
Select the PrintQueue which you want to create the Print Environment for and click Next >.
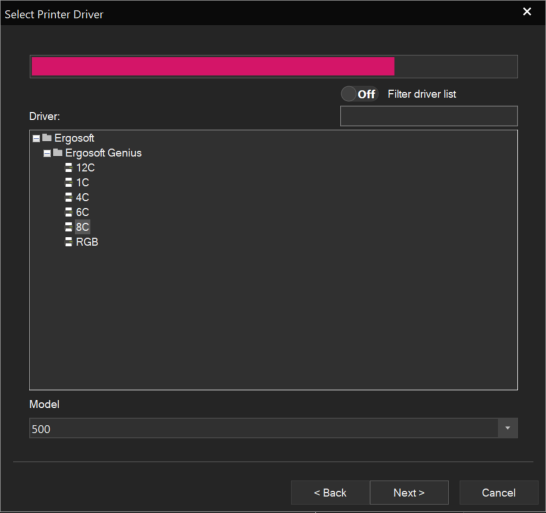
Select the printer model which corresponds to your printer.
Then click Next >.
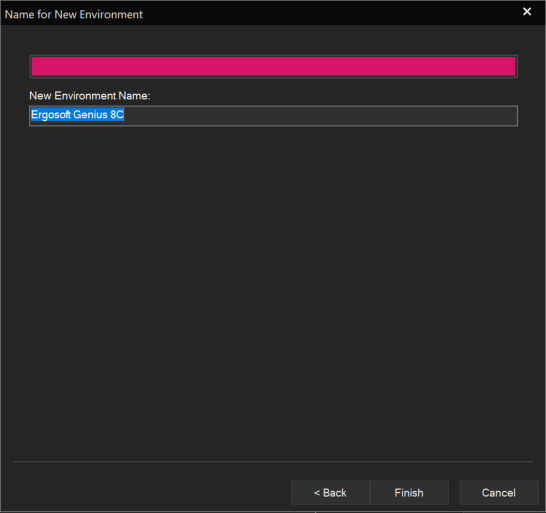
Enter the name for your Print Environment and click Finish to end the creation of the Print Environment.
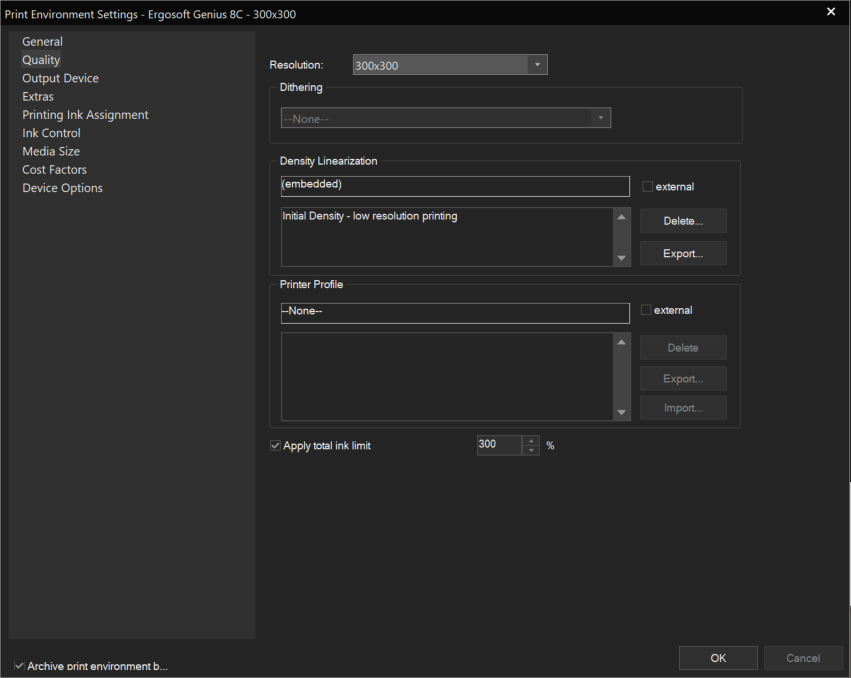
Once you completed all settings of your Print Environment, click OK to proceed.
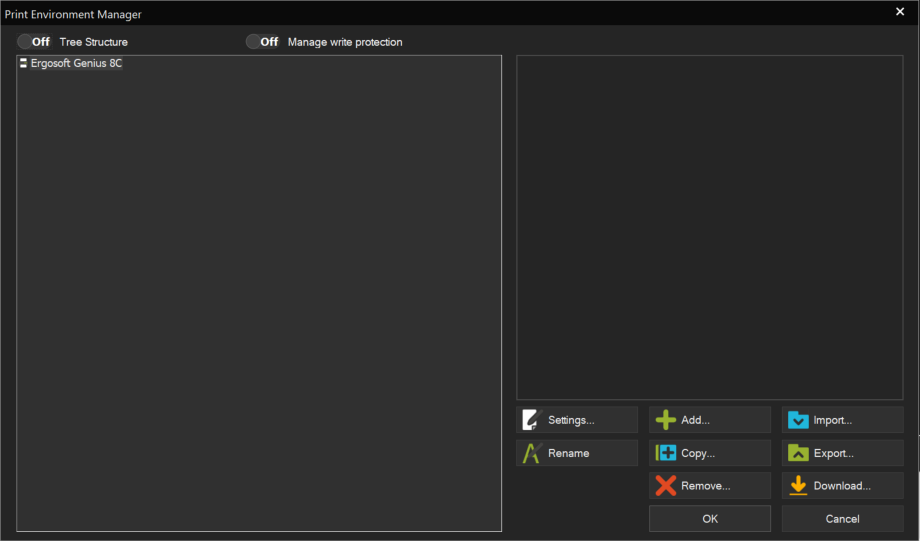
Click OK to leave the Print Environment Manager.
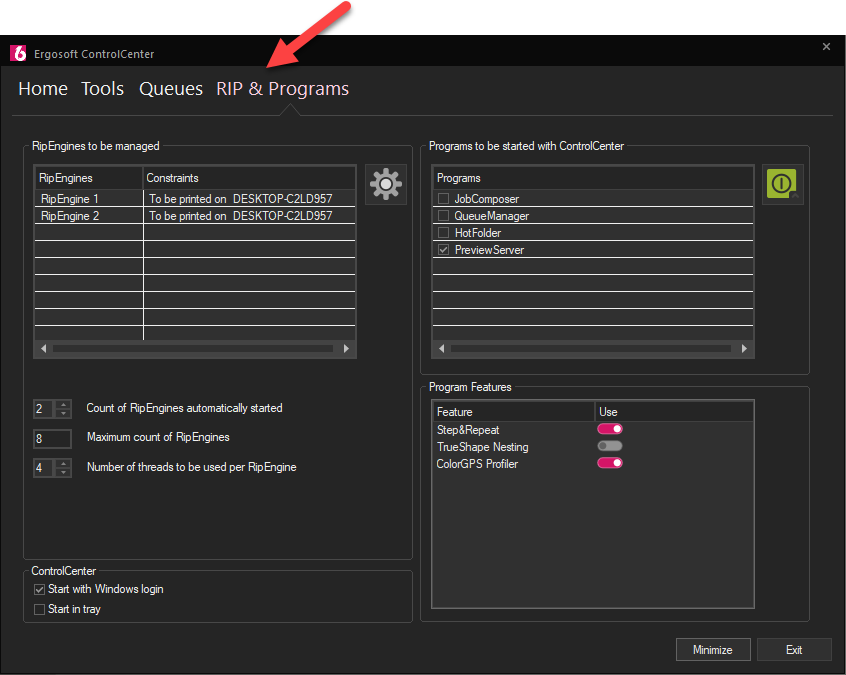
9. Configure the RipEngines
To be able to rip your files on an output workstation, you must define how many RipEngines should run on each PC in the RIP & Programs section of the ControlCenter.
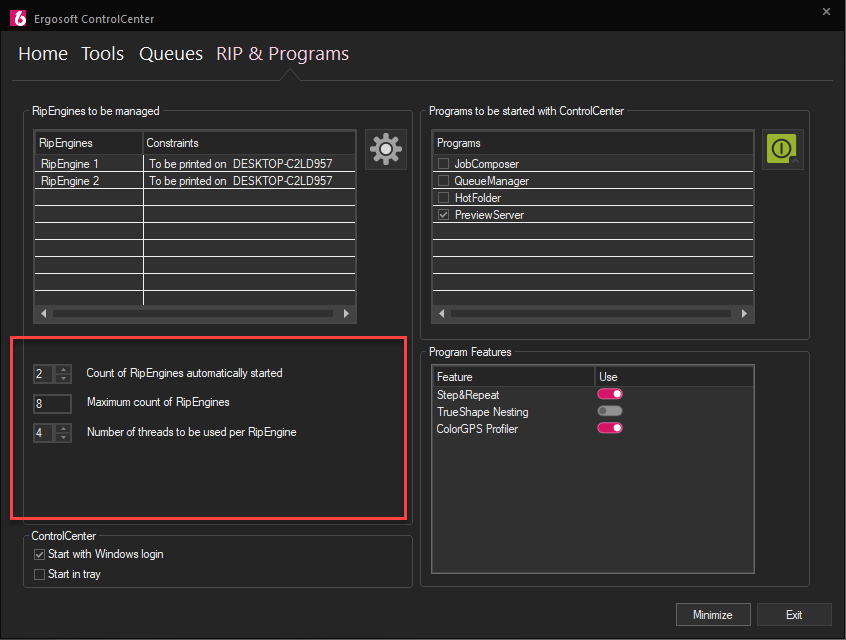
Use the Count of RipEngines automatically started to define the running RipEngines count. The specified number of RipEngines will automatically be started by the ControlCenter.
Note: The default setting of the RipEngines count on each Networked Departments workstation is 0.
The total number of RipEngines to be distributed depends on your license (the default quantity for Networked Departments is sixteen (16)) and they can be distributed to the output workstations according to your requirements.
10. Configure your Program Features
In the RIP & Programs section of the ControlCenter you also must define which option (like Step & Repeat, ColorCombine, TrueShape Nesting, Background Color Removal, ColorGPS Profiler, Color GPS Profile Editor) should be started with which JobComposer / on which PC.
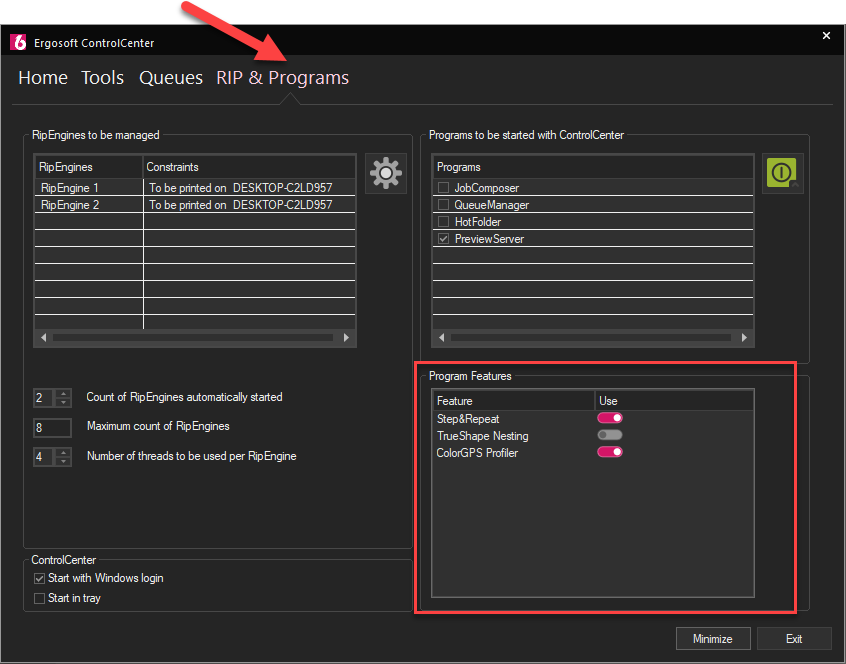
If an option is available and shown in the Program Feature section or not, depends on your license. If an option is licensed, it will be visible in this section. If the button is set to On, the respective option will be available in the JobComposer started on this particular workstation. If the button is set to Off, the JobComposer will start without using the respective option.
Good to Know
Your license information
On the PC where the dongle is plugged into, you can check the license by opening the Wibu CodeMeter Control Center and by clicking the WebAdmin button. On the CodeMeter WebAdmin webpage that opens, click on the Licensing Monitoring section at the top to see the currently available and in use licensing on your network.
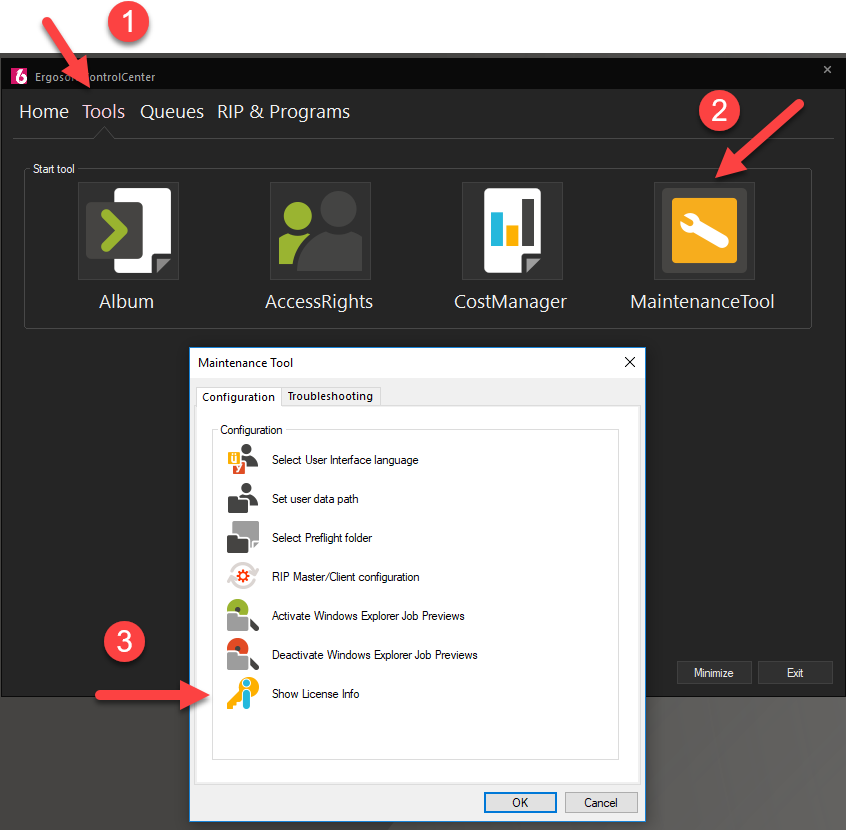
You can also access the license information on any PC in the Networked Departments network via the ControlCenter > Tools > Maintenance Tool > Show License Info:
ControlCenter
The ControlCenter, as the central component of Ergosoft, is launched first. All other secondary components are then configured and started from the ControlCenter. The ControlCenter will also make sure that all necessary background programs are running.
The ControlCenter provides individual configuration and auto-start sections for the output stations, RipEngines and other applications.
Communication Utility
The Communication Utility establishes and controls the communication between the connected PCs.
The Communication Utility is controlled and automatically started by the ControlCenter. It is running in the background and needs no inputs from the user. But even if it is a background application, it is crucial that it is running all times, because without this connection the JobComposer(s), RipEngine(s), and PrintQueue(s ) / CutQueue(s) will not work.
Central JobQueue
All jobs created in Networked Departments are managed by one Central JobQueue which runs on the Networked Departments Master workstation. This Central JobQueue gives the user a complete control over production for his entire distributed setup from any connected system using the QueueManager.
QueueManager
The QueueManager uses pane windows over tiles to provide a complete production overview and job management. It allows custom workspaces, supports custom filters for various views (e. g. by printer / cutter, by media, by PrintQueue / CutQueues workstation, by time range, etc.) and provides an extended production data export.
The QueueManager can also entirely replace the use of Print- and CutQueues.
Shared Storage
The Shared Storage folder is a central folder used by all Networked Departments workstations to share image and user data (e. g. Print Environments, Cut Environments, Presets, JobTickets, Preflights, SwatchBooks, Access Rights) and synchronizes settings across all Networked Departments systems. The Shared Storage folder must be accessible by all the systems in the Networked Departments setup.
Floating Licensing
The network licensing gives the user the ability to have only one dongle connected to the network and have that licensing shared across multiple PCs simultaneously.
The license items are automatically claimed and used, when a license module is launched on a particular workstation. Once the module is closed, the license «returns» to the dongle and makes it immediately available for any other workstation in the system.
Access Rights
The Access Rights feature offers the protection of system settings and company standards from unwanted changes. These settings can be made by an administrator from anywhere in the Networked Departments network.
Graceful Shutdown
For Networked Departments to run properly, several applications (visible applications and background tasks) need to communicate. If one application is terminated independently, the whole system will be unable to function.
The ControlCenter handles the start-up and shutdown of the linked applications. Exiting the ControlCenter will automatically close all running applications on the PC in the correct order.
To ensure a continuous communication between all Networked Departments workstations, the last component to be closed will always be the Communication Utility. If one component can’t be closed, the Communication Utility won’t terminate: If a JobComposer is running, a message will prompt the user to save the work and close the JobComposer. The RipEngines and PrintQueues will only be terminated, once they are idle.
If the ControlCenter on the Master PC is closed, it will broadcast a graceful shutdown to all Client workstations. The Communication Utility as well as the JobQueueServer on the Master PC will only close, once all Networked Departments Client systems are terminated successfully.
Standalone Configuration
In case the communication to the Master workstation does not longer work, the Ergosoft standalone configuration can be used to make a workstation run independently.
- In the ControlCenter, go to Tools > Maintenance Tool and run the RIP Master/Client configuration wizard again. Choose This workstation should run in standalone mode.
- Go to the Shared Storage folder and copy the required subfolders from the shared data folder to the local user data folder.
- Recreate the required PrintQueues.
- Set the number of running RipEngines.
Related Articles
Ergosoft Installation and License Activation
Ergosoft licenses can be activated either on a physical dongle or on a certain PC. Once activated, the license is bound to the selected license container. Depending on the licnese container, the installation of Ergosoft RIP is slightly different. ...Import Settings from Ergosoft 15 and 16
Updating from an earlier version of a RIP to a more recent one can seem like a daunting task, but with the following steps you can easily take over your printer configurations and settings from Ergosoft RIP 15 to Ergosoft 17. It is recommended to do ...Latest Version of Ergosoft
Release Process Ergosoft provides two major software releases per year. Spring Release: Typically published in April Winter Release: Typically published in October Each release includes: Updated and newly supported printer drivers New features and ...Ergosoft Maintenance Program – Overview
This article explains how the Ergosoft Maintenance Program works, including its coverage period, included services, and reactivation options. Maintenance: The Ergosoft Maintenance Program was introduced in 2023 alongside the switch to annual updates ...Implementation Support through Ergosoft
Implementing Automation can be a complex task. ErgoSoft offers its assistance both in the application of digital printing principles and practices as well as in how to introduce automation to a workflow and how existing workflows can be adapted to ...